

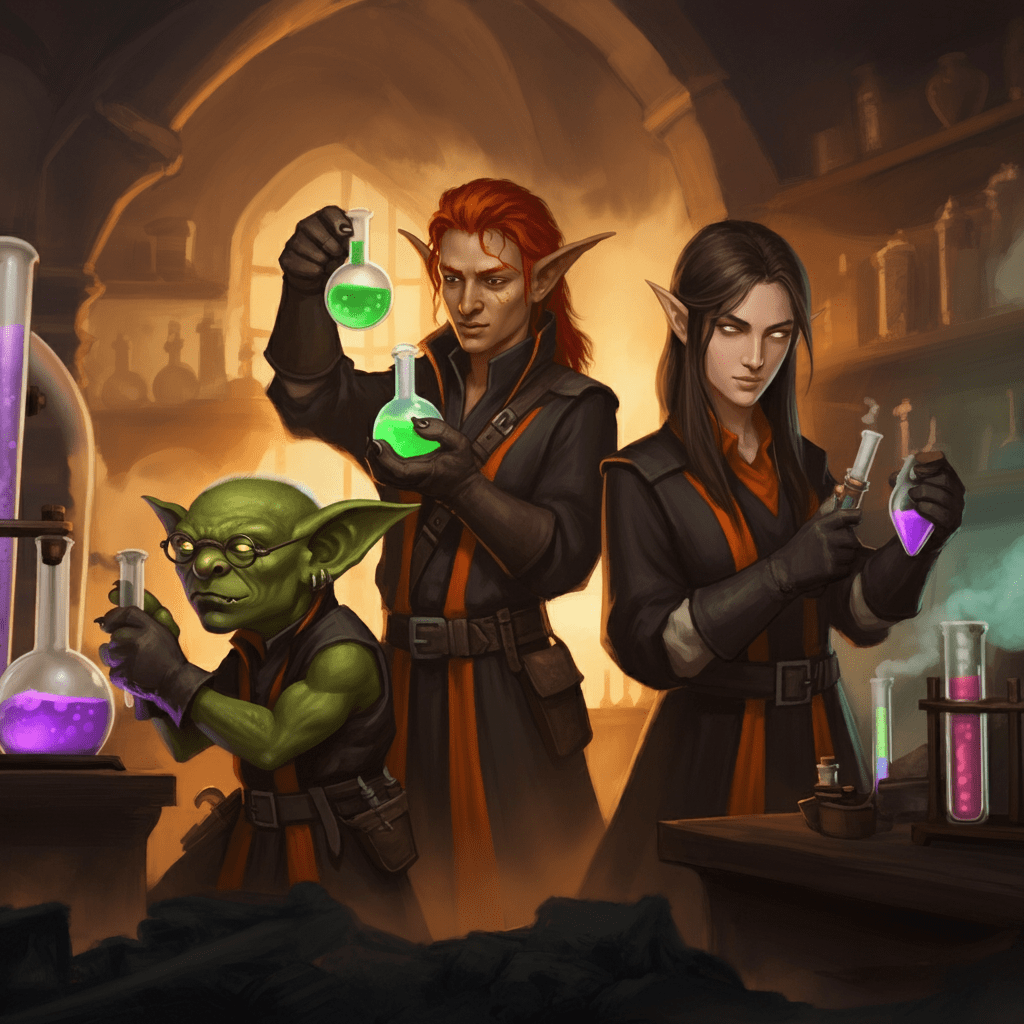
They need to return the eggs to Kaida before they hatch, generated using Google Imagen3.
Even a city firmly under the iron boot of a dictatorial regime has opportunists for canny adventurers and rebels to engage in misadventures. Some citizens still need help with various problems, although many of those problems revolve around the soldiers in the street. It is also a safe bet that the continued success of said soldiers has bred complacency in the rank; complacency breeds incompetence, and incompetence breeds opportunity for the cunning rebel. This chapter contains many such opportunities for the players to strike the regime where it hurts, gain valuable resource points, unique resources, and strange new allies.
Sidequest attributes
Unlike the sidequests in many DND campaign books, the sidequests in this campaign have unique attributes. These attributes describe important elements of the sidequests’ nature. The attributes are as follows.
Repeatable. The sidequest can be repeated multiple times. This may be because there are multiple locations where the quest can occur or the events enabling the sidequest are occur on a regular schedule.
Requires resistance reinforcements. It is recommended the players bring along some additional fighters in the form of resistance members.
Faction Mission. One of the factions in the city issued this side quest, as well as gold and magic items. The reward for this quest is a change in opinion for one or more of the factions.
Improvisation heavy. This quest requires a lot of improvisation from the dm.
There is a cat burglar loose in the city, generated using Google Imagen3
A Dangerous Game
Recommended level 2
Faction Mission
A bounty has been issued for one John B Pitts, half-elf, trap designer, and former employee of Brangor Security Solutions, who was fired for erratic behavior. A now vengeful John has taken several people hostage and fortified himself into a townhouse in Alteburg. A bounty has been placed on John, but the only way to capture John is to get through his deathhouse. When the players arrive at the townhouse in Alteburg, they find two bounty hunters, Micky and Douglas, sent by Cassidy to keep an eye on the place. They warn the players that there are traps in the house and wish them the best of luck in collecting a bounty that has claimed half a dozen bounty hunters so far.
Steaming Entry Hall
The only way into the townhouse is through the front door, which leads to a sparsely furnished entry hall with a staircase leading to the second floor and several doors leading to other rooms. The moment the players enter through the townhouse’s front door, the door slams shut and magically seals behind them. A magic mouth appears on the doorframe and says the following message.
Beware all who enter, for there is no escape from the death house of John B Pitts. HAHAHAHAH!!!!!
After the magic mouth delivers its corny one-liner and maniacal laugh, several magic circles activate, and 8 steam mephits appear.
Magic circles. The magic circles are constantly producing jets of scalding hot steam. Any player that starts its turn in one is dealt 1d4 fire damage. Furthermore, the steam is slowly increasing the temperature in the room. When combat beings start a timer 1d4: when the timer hits zero, the temperature in the room becomes unbearably hot, and all players must make a DC 16 constitution check or take 1d4 damage at the start of their turns. The circles deactivate ones the mephits are defeated.
Treasure. A sweep of the first floor reveals that most rooms are empty; there are voids in the dust, suggesting that furniture and paintings were in the rooms recently but have been removed. The kitchen is the one exception, with a china cabinet that is still fully stocked. The china and silver are worth 50gp to the right buyer.
The Hall of Spinning Blades
After exiting the Steaming Hall, the players find a 70-foot-long, 10 feet wide hall with boarded-up doorways, a pair of wooden pillars studded with 1-foot-long blades on parallel tracks in the floor, and a door leading into a room at the opposite end of the hall.
Bladed Pillars trap. The twin pillars move back and forth on a regular cycle, moving to the opposite end of the hall every round on their turn. Also, at intervals of 10 feet, sets of pressure plates are set between the tracks and the walls. When even the slightest pressure is placed on these plates, the closest pillar will rocket toward the pressure plate. Any character that steps on the plate must make a DC 16 dexterity check to dodge out of the way of the pillar. Failure results in 2d4 slashing damage. Players can render the pillars immobile for a single round by jamming an object into the mechanism. With a DC 17 sleight of hand check, they can also disable the pressure plates.
Blocked off Chambers. The doors along the hall require a DC 15 strength check to break down. The rooms beyond are filled with the mechanisms for the trap. A player can make a DC 17 intelligence check to understand the mechanism and identify how to jam it permanently. The players must use a thin metal object to jam the mechanism to stop the gears.
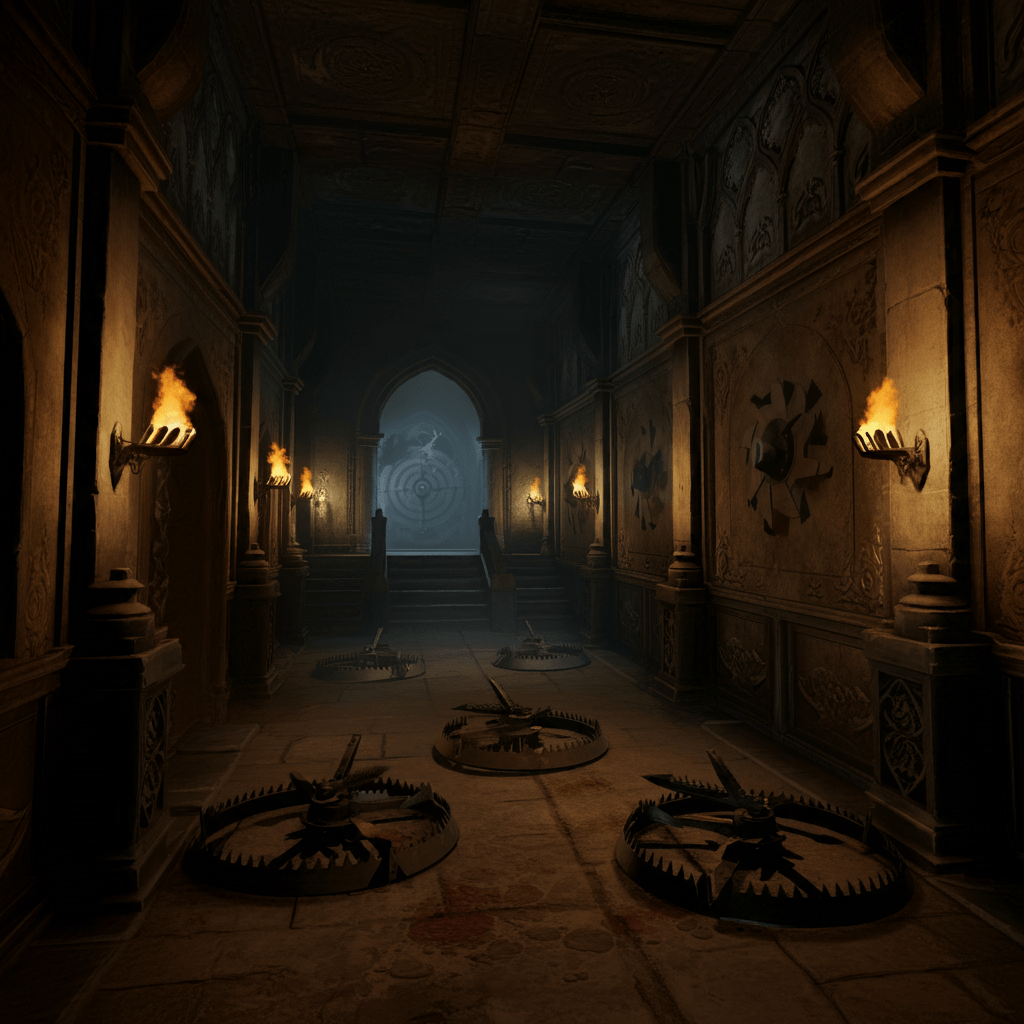
Trapped Hallway, generated with Google Imagen3
Chamber of Noxious Gases
After passing through the hall of spinning blades, the players enter a large windowless room made of metal plates. They can spot a door on the other side. Suddenly, they hear a voice ring through the chamber.
It seems you overcome my lesser traps, no matter this one is my magnum opus, one designed to kill any who enter. When it is done with you, there will not even be a corpse to bury. But if you somehow manage to survive my gas chamber, I will give myself up.
After that, the door slams shut behind them, and the rooms start to flood with poison gas.
Poison Gas. The gas flooding the room is highly corrosive. The players must make a DC 11 Constitution saving throw every round or take 1d4 poison damage. The DC for the check increases by 1 every round.
The loose panel. The trap the players are in was never designed to allow them any possibility of escape; however, there was a subtle flaw in the design, an oversight that John B Pitts forgot to take into account when designing the trap; the gas has corroded some of the nails affixing the iron sheets to tge wall. Any player who makes a DC 15 investigation check can find a metal sheet with rusted nails and curling sides. Closer investigation reveals a slight draft coming from the curled-up edge. A player can rip the sheet of metal off the wall using a DC 12 strength check to reveal a crawlspace big enough for the players to crawl through
Mr. Pitts Breakdown
The crawlspace leads to the next room where Mr. Pitts, a bean-thin little half elf with red hair and glasses, is waiting expectantly for the players to fail, seemingly to deliver some big speech to his hostages, a trio of young noblewomen that are bound and gagged in the corner. The moment he spots the players, he goes into a tailspin, asserting that they can’t escape the gas chamber and must have cheated somehow. With Pitts spiraling into despair, it is easy for the players to subdue him. Returning to the rose with Mr. Pitts nets the players 100gp in reward and the status of honorary union members. They also gain +2 opinion with the SBHU.
Arms Shipment
Recommended Level: at least 2
Repeatable
The kingdom’s manufactories strain to keep up with the demands of Murtagh’s expanding army and conquests. So every two weeks, like clockwork, a trade ship arrives in the city bearing a shipment of arms and armor from dozen of cities across the multiverse. However, Kraggath likes to keep the arrival time of the ship a secret, and the ship docks in a new location every visit.
Hitting the Streets
To find the time the ship arrives and the location where it docks, the players will either have to hit the dock ward for info or request aid from their allies in the factions. However, given the sensitive nature of the information, they should expect that any faction they ask will want a favor in return.
On the other hand Kraggath’s sailors and marines are lowlifes who are not above making a quick buck at their’ boss’s expense. A DC 17 charisma check will allow the players to successfully extract the info out of these individuals. However, Kraggath’s men are indeed lowlifes and thus easily irritated and prone to violence. Should the players fail their skill check, the individuals they question get increasingly angry. Every time the players fail the charisma check, roll a DC20. On a roll of 15 or higher, the sailors and marines decide that it would be more “interesting” to deal with the players in a far more brutal fashion and attack.
- Following each successful robbery, an additional 2 marines will be added to the security detail. After the second successful raid a marine officer will be added to the detail.
- Kraggath will take additional security precautions after repeated successful robberies. After the third attempt, a warship armed with ballistas will be stationed next to the cargo ship. The ship will fire one ballista shot each round at a player character on initiative count 20

Arm shipment raid, generated using Google Imagen3.
The Weapon Shipment
When the players arrive at the pier where the ship is moored, they find a hive of activity. 12 commoner laborers unload crates from the ship and load them onto waiting wagons. A squad of 8 marines is standing about the dock, looking pretty bored. The dock is a cluttered expanse of wagon crates, barrels, and small shacks that provide ample opportunities for cover and dark corners to hide in; stealth checks made to approach the ship are made with advantage. When combat does start, the laborers scatter.
Ships Bell. When the first marine is defeated, the marines will try to ring the ship’s bell to summon reinforcements. So long as one marine is still alive, one of the marines will move towards the bell and use an action to ring it. When the bell is rung, a timer d6 is started. When the timer reaches zero, a random patrol from the navy enemy table arrives.
Arms Shipment Reward:
The arms within the cog equate to enough equipment to arm 70 resistance fighters at half the regular price or roughly 1200 gp if sold on the open market. Additionally, among the cargo, the players discover one of the following unusual items:
- Siege Engine Parts: Dismantled and stored in crates for shipment
- Golem Parts (Iron): Components to assemble a war golem
- Material Components for Spells: Crates containing 400gp worth of components for spells ranging from cantrips to 3rd-level spells
- Various Poisons: Crates containing various poisons and materials for making poisons
- Expensive Wine and Spirits: 1d12 crates of assorted high-quality alcoholic beverages hidden among the crates. Each crate is worth 200gp to the right buyer
Development:
If the players successfully rob the arms shipment, the players will find subsequent attempts to steal the arms shipment will meet stiffer resistance.
Army Heels
Carric and his men, Generated with Google Imagen3
Recommended level 3
Faction Mission
The players are approached on the street by an otter-faced pooka druid. She introduces herself as Karin Hirtreiter. She has a favor to ask the players. A particularly loathsome elvish army captain, Carric Liadon, and his men have been harassing the shopkeepers in Slibermond. He uses false complaints about the service as an excuse to smash the shopkeeper’s stores and stalls. He has not dared to do his trick in one of the Silver Moon Coven’s businesses, but the stores on either side of her herb shop have been targeted. She thinks it is only a matter of time before Carric targets her shop or one of the other businesses run by the other sisters of the coven and fears that when he does, Tansy will probably not let him or his cronies live, thus ruining the careful balancing act that allowed the coven to run its secret activities.
The players will only have to do a cursory search of Slibermond to find their quarry. The players find army captain Carric and a squad of 6 infantrymen smashing up a bardic instrument maker’s shop and having a grand time destroying the merchandise within. The players must kill Carric and give the infantrymen a good thrashing while at it. If they successfully deal with the captain, the players get 6 healing potions as a reward, and the coven’s opinion increases by 4. Army attention in Slibermond increases by 2.
The arsonist
Recommended Level 2

The arsonist, generated with Google Imagen3
Faction Mission
One of the Old Watch watchmen, an orc named Ruthgar Bonefist, arranges a meeting with the players via deaddrop. When the players meet the constable in a back alley, he tells them a magical arsonist is loose in the city, burning down buildings in his old beat in Steinufer. The watch is laser-focused on dealing with the resistance, so it has been unable to investigate. The only assistance Ruthgar can give is the address of the last fire. Ruthgar promises that he will find a means to repay the players for looking into the matter.
If the players investigate the arson site and make a DC 15 arcana check, they can sense the faint trail of magic leading away from the scene. The trail leads southward to a warehouse in Tannery Row. Inside, they find an navy mage with a ring that can summon magma mephits once per day. The wizard is an escapee from the Sanctuary of the Resplendent Hand with severe pyromania. He will immediately attack the players and fight to the death. After defeating the wizard, the players can claim his ring of mephits , and Ruthgar will have 45gp delivered to them and a letter telling them where various old watch deaddrops are located delivered via courier. Old Watch’s opinion of the players will increase by +4.
Alternative intro: A novice from the Sanctuary of the Respondent Hand approaches the players with an urgent request; one of the patients of the psyche ward has escaped. The escapee is a wizard with extreme pyromania. If the players can recapture the wizard, the Sanctuary rewards the players with 4 potions of healing, and the Sanctuary opinion of the resistance increases by +2
Bad Mojo A Go-go
Aunty Foul tempts you over to buy a curse generated using Google Imagen3.
Minimum level 3
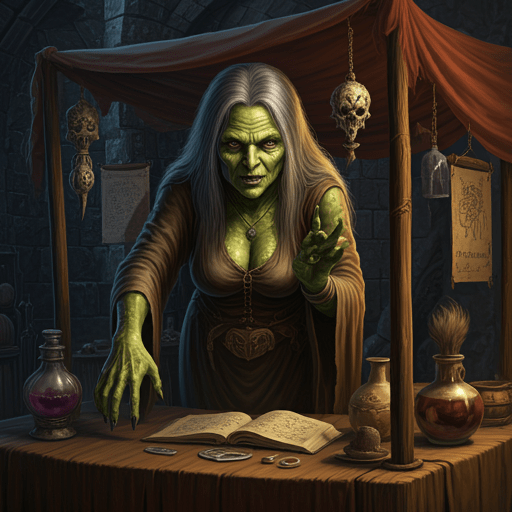
While the players are shopping in the Goblin Market, the players are called over by a hideous green hag who runs a stall that sells unusually named curses (word salad and bug juice, for example) by the food stands. She introduces herself as Aunty Foul and says she has a potential job for them if they want to make a quick buck. Several members of the royal military have been harassing her in the marketplace. She wants them knocked down a peg. She gives the players a jar of foul-smelling liquid with the label ‘Chocolate Moose’ pasted to the side. She tells the players that all they need to do is get a little bit of the contents of that jar into the hoodlums she wants dealt with, and they will transform into a moose. She gives the players a list of names and descriptions, a hag eye to see that the task has been done, and says that if they pull it off, she will give them a purse filled with 100gp. The targets are:
- Grut the Glutton. A veteran who is stationed at the River Bastions and is easily identifiable by his the X shaped scars on his face
- Arnold ManyEye. A marine who serves in the Royal Navy onboard the Terror, he is easily identifiable by his eye-shaped tattos over his body.
- Selvynra Vhal’dra. A drow warrior with spider web tattoos all over his arms who works in mithril hold in the foundry.
Beast of Burden
Recommended level 4
The player learns that a Unicorn mare named Elysora has been looking for her son, Calidor. He joined the army, and she has not heard a peep from him since and is worried sick. If the players contacted her, she was almost ready to cry. Every time she inquires about her son’s wellbeing, she gets either stonewalled by the men at the Carrey Battery gates or attacked when she asks random soldiers about her son. She has even tried to use magic to send him a message, but he never receives it, which makes her fear that her son is in trouble. If the player can deliver a letter to her son and return with the reply, she can give the player an IOU of 200gp.
Calidor’s Burden
If the players investigate the Carrey Batteries either by infiltrating themselves or recruiting insiders, they find out what happened to Calidor pretty quickly. It turns out that Calidor’s strong body impressed Count Cathan, who needed a new warhorse when Calidor signed up. From that moment onward, Calidor’s life has been a living hell; he was abused until his spirit was broken, fitted with a magic collar to prevent him from running away or using any of his magic, and forced to serve as a Cathan mount. He now carries the High Marshall on his daily journey into the city to inspect the new weapon factories and training camps, and his night is locked up in the Carrey Battery’s Stables.
The players can only approach Calidor when he is locked into his stall in the Carrey Batteries. If the player’s characters talk to him, they find that he has accepted his fate and is seemingly unwilling to escape. The only way to convince Calidor to try once more to escape is to remove the collar from his neck. However, the collar is locked with an unpickable magic lock that requires either casting dispel magic or a key Cathan keeps on his person at all times. Once the collar is removed, Callidor can teleport himself safely. Upon returning to Elysora, she is overjoyed that her son is safe; however, she is troubled by the emotional scars that Cathan inflicted on him. She promises the players a favor for saving her son and a further favor if they can undo some of the damage that Cathan did.
Buried treasure
Recommended level 4
Faction Mission
The Rats’ leader, The Rat King, personally contacts the player with a request. Last night, when the fog was the densest, one of their most capable pirate captains, John Fitzgerald, had a run-in with the Royal Navy while returning to the city after an apparently profitable cutting-out expedition. His ship was lost with all hands in a boarding action. He usually stashed the loot in a dead drop to be collected by one of the other Rat crews. It is almost certain that he stashed the loot in one of the usual dead drops; the problem is that John died before telling anyone where the treasure is, and the fog was too dense to figure out where he stashed the loot. Worse, the Navy thinks John stashed the treasure, too. The harbor and the harbor islands are crawling with sailors and marines scouring the coast for the treasure. If the players can find the trove, they get a generous share of the loot.
There are 4 dead drop sites that the players need to search.
Turtle Island Light The dead drop site is in a small cave at the base of the cliffs just beneath the tower of the haunted lighthouse on Turtle Island. When the players arrive, they find a navy longboat with a marine officer and a squad of 8 marines searching the rocky shore beneath the lighthouse. Combat here is dangerous due to the rough surf at high tide. Players knocked into the water must make a DC 12 Athletics check to avoid being thrown into the cliffs. Players who fail the check receive 1d4 bludgeoning damage. Searching the dead drop site reveals 1d20 gp but no treasure trove.

Johns’s treasure, generated with Google Imagen3
Flooded cave Beneath the batteries built into the Carrey Headlands is a cave that partially floods at high tide. The players must swim through the cave to reach the dead drop chamber. The current flowing through the cavern is strong, so they must make a DC 12 athletics check to swim through the cave and reach the chamber. There they find the spoils of Captin Akins last expedition: 500gp of coinage, 250 gp in various gems, 1 ton of silk, spices, and fine liquours worth at least 1000gp, a +1 longbow, +1 longsword, a plus one suit of studded leather armor, a cloak of the manta ray, a ring of protection +1 and a Cloak of the background.
The Wreck of the Smiling Mary: The Smiling Mary was a trade galleon that wrecked and was beached on a rocky shore on the eastern side of the Carrey Headlands a few decades ago. The wreck has never been cleared away because it is in a precarious position in a field of boulders. Captain John has used the ship’s corpse as a dead drop site in the past. When the players arrive, they find the wreck swarming with navy sailors, and 18 of them are crawling all over the wreck for any sight of the treasure. The galleon is in terrible shape, and the decks and hull cannot withstand a fight on her deck. The players will have to be very careful where they swing their weapons. Any player who misses with a two-handed weapon or spell causes part of the hull to collapse, dealing 1d6 damage in a 5 radius. Searching the hull revealed 10 gp of small valuables but no treasure.
Haigh’s Island There is a hidden dugout on the hill on Haigh Island where the rats stash their smuggled goods, and John was known to use it as a place to stash the haul from his expedition. When the players arrive, 7 navy sailors and 7 marines search the island while a small warship sits at anchor. If the players try to fight the shoreparty the warship will start to will provide somewhat inaccurate supporting fire on the second round of combat. The ship will fire a single shot from its deck catapult onto the battlefield. The ship will leave once the shore party is defeated. Searching the dugout reveals some barrels of provisions and a few bottles of good quality rum but no treasure.
If they return to the Rat King with the treasure, they receive 100gp each as a reward and choose one magic item from the horde. The Rats’ opinion of the players increases by +7. If they keep the treasure for themselves, the rats’ opinion of the players drops by -15.
Bury the hatchet at Sea
Minimum level 2
Improvisation heavy.
This quest starts after Fredrick is rescued and Duchess Muirín Uisceanna joins the resistance.
Lady Muirín is not pleased when she discovers that the resistance has rescued Fredrick and intends to heal him back to fighting form. She and her nominal liege have a long and sour history. She is threatening to leave the resistance over the resistance recruiting that quote,” cold-hearted fleabag of a king.”
The players must determine the origin of their falling out and then work to bury the hatchet or else lose one of their most potent resistance members.
Lady Muirín’s story. If the players ask why Muirín hates Fredrick so much, she tells them about their first face-to-face encounter. She was 18 then and had a classic schoolgirl crush on the perpetually young king, at least the one from the stories her Grandmother told her, the ones that painted Fredrick as wise, kind, and waiting chaise and pure for his queen to arrive. When she had her official coronation at the palace, she tried to woo Fredrick, but all Fredrick did was slump on his throne, his eyes cold and uninterested, his clothes and body unwashed. When she thought she had piqued some interest in the king, he had a burst of rage and ordered her out of the room.
Fredrick’s Story. If the players ask Fredrick about what happened at Muirín coronation, he looks humiliated. He explains that the constant search for his wife, Aoibheann, sends him through a predictable cycle of gleeful denial, frustrated anger, desperate bargaining, and finally, all-consuming depression; for the last 35 years, he has been in the depressive stage of the cycle. On the day of Muirín coronation, he was having an especially bad day, and Muirín flirting awoke a slight bit of romantic interest. The outburst occurred when he realized that he was being unfaithful to his wife. He regrets what happened that day and sincerely wishes to apologize.

Lady Muirín humored the players by listening to Fredrick’s explanation, Generated with Google imagen3
Bury the Hatchet. It is up to the players to help the two bury the hatchet. The players must create a plan to get the two of them in the same space and keep them there long enough to make amends. This will likely be a tricky proposition, with Fredrick still recovering from his ordeal and Muirín being a merwoman. Once the two are in the same place, the players must use roleplay and skill checks to coax and support Fredrick to make his regret and apology known to Murin (and likely inform her of his tragic history) and convince Muirín to listen. If the players succeed, Muirín face begins to soften a little, and she starts to cry a little after Fredrick tells his tale. She apologizes for her behavior since the coronation and apologizes to the players; she will continue supporting the resistance.
Cathouse blues
Recommended level 4
Faction Mission
The players are approached by a hobgoblin syndicate captain named Siobhan “Silver Tongue” O’Reilly. Siobhan dresses in a slick-looking white three-piece suit, has greased-back hair, and is a smooth talker. He wants to hire the players for a particular job. He used to run a night club called the Kitty Kat Lounge in the Red Lantern Warrens that got shut down by the watch. He wants to reopen, but several of his former employees are missing, and one of them has apparently taken the emergency funds in the cellar that was supposed to fund the restoration of the lounge in case something like this happens. He wants the players to track down these three individuals and recover the money from the thief. If they succeed, they get a 1% share of the club’s profits and whatever other benefits he can think of.
The Kitty Kat Lounge Post Raid, Generated with Imagen3
- Sylrissa: Sylrissa, the drow who used to tend the bar at the Kitty Cat Lounge, is relatively easy to track down. Simply asking around the Red Light Warrens and the Goblin market will lead the players to Sylrissa’s new gig, tending the bar at the Summer Rose. When the players enter the Summer Rose, there are 4 thugs, 4 scouts, and a spy in the bar drinking. Sylrissa will tell the players she did not steal the money, and a DC 10 insight check will reveal that she is telling the truth. If asked about the other two missing employees, she mentions that Veridiana was discussing turning her life around and seeking religion; she does not know about Grimgar.
- Veridiana: The teifling waitress Veridiana, has not been seen around Underberg for quite some time. The last time she was seen was right after the Kitty Cat Lounge was shut down by the watch. The other dancers at the club recall that she took the watch raid as a sign that she needed to turn her life around. The girls also remember that she used to be religious, always praying after work, and they suggested canvasing the city’s houses of worship to find her. The players will eventually find her at the Sanctuary of the Resplendent Hand working as an apprentice nun-orderly. Veridiana has no idea who took the money and tells the players this. If the players try to press too hard or resort to intimidation, Veridiana will scream and draw 3 priests and 7 acolytes to escort the players out.
- Grimgar: Grimgar the bugbear bouncer, stole the money and is hiding in the dock ward while he waits for a smuggler from the Rats gang to arrive. A DC 14 Investigation or Perception or questioning members of the rats in the dock ward reveals that a bugbear matching Grimgar’s description has been hanging out in a rundown warehouse with some Rat muscle in the northern part of the dock ward. The players find Grimgar held up in a rotting warehouse filled with spoiled abandoned merchandise on a decaying pier deep in the maze of the Dock Ward. Grimgar has hired a bandit captain and 6 thugs to protect him until his ship arrives. The rotting floor is so weak that it will break if the players run across it. Moving at speed will cause the floor underneath to break and the players to fall into the harbor below.
When the players recover what remains of the emergency fund, Siobhan thanks them. As promised she gives them 1% share of the club’s monthly profits (which amounts 3d20 gp per month), lifetime VIP membership at the club, and promises to spread the word about the players, resulting in a +2 to syndicate opinion of the players.
Cat’s Meow
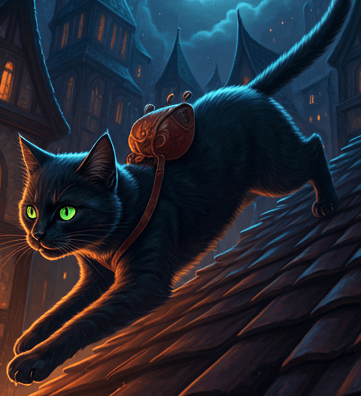
Recommended Level 2
Rumor says that a cat burglar is stalking the homes of wealthy women in Alteburg. When the victims return home, they realize their jewelry boxes have been emptied. One of the victims, an elderly tiefling widow named Mrs. Kentworth, has posted a reward for the return of a particularly sentimental diamond necklace stolen by the thieves.
The investigation is apaw
If the players take up the job and seek out Mrs. Kentworth, she explains that the robbery happened while she was attending an opera at Elmwood Hall. She returned home to find her bedroom window open, her vanity raided, and Midnight slipping out the open window. If asked who Midnight is, she tells them that Midnight is a black cat with a white spot on his chest who has been visiting her off and on for a few weeks, always appearing at her bedroom window. If the players are polite to their host, Mrs. Kentworth will tell them that she knows most of the other thief victims and can write a letter of introduction to let them investigate those crimes as well. Interrogating the other victims reveals a similar story; all the victims attend functions at Elmwood Hall and return to find their bedrooms broken into and valuables stolen. Incidentally, a cat bearing a striking resemblance to Midnight has been seen at all the crime scenes.
Investigating Elmwood Hall
If the players decide to investigate Elmwood Hall, they will find Panthor Silverhoof overseeing preparations for the night’s performance. He will direct the players to the ticketing booth if asked about theft. The ticketing booth will confirm that all the victims sit in the same few box seats on the left side of the theater; they will have to ask Panthor for the key to the boxes. If the players go to the theater boxes and make a DC 15 investigation check, they notice a loose spot in the roof where something the size of a cat could squeeze in. They discover that a cat that is extremely similar but not quite to the description of Midnight is watching them, almost studying them. The cat flees before the players can react.
Investigating Midnight
The players can ask around the ward if anyone else has seen Midnight the cat. They can also use Persuasion (dc 15), deception (dc12), and intimidation checks(dc17) to ask around the neighborhood. If the checks succeed, they learn that a cat fitting Midnight’s description has been hanging around the townhouse of the Leonis Family.
Midnight Stakeout
If the players complete the last three encounters, they should know that the victims were extensively cased beforehand. Midnight is likely the burglar; the next target is the Leonis Family. Incidentally, the family has box tickets for a play to be held that night.
The players can stake out either the theater or Leoni’s residence. Either way, have them do a DC 17 perception check. On success, they spot a black cat with a backpack exiting the theater or entering a bedroom on the mansion’s third floor. However, before the players can act, the cat tears off across the rooftops.
Cat Chase
The black cat tears off across the rooftops, leaving the players to follow behind. The cat will attempt to lose its pursuers by dashing through the rooftop obstacles.
Loose tiles. The cat will tear across a section of the roof with loose tiles. It can cross the tiles with no problem, but the players must make a DC 10 dex check to keep their footing. On failure, they fall prone.
Gap. The cat jumps over a 10-foot gap between houses, and the players can jump over the gap by making a DC 13 athletics check.
Obstacle course. The cat weaves through a line of rooftops covered in chimneys and weather vanes. The players must make a DC 15 dex check, or the obstacles are considered difficult terrain.
If the players manage to keep up with the cat, they witness it climb into the steeple of a church and disappear into the darkness.
Catfight
When the players climb the steeple, they find a bellloft turned into a cat’s lair filled with stolen items, but no Midnight. Suddenly, Midnight drops on the party member with the lowest hp and gives them a good bite. He tells the players they should leave him alone if they know what is good for them, for he is a cat-sith. Midnight fights to the death to protect his horde.
Treasure. Once Midnight is defeated, the players find every stolen item in the horde worth 600gp in total. There is also a fumigator’s flask among the treasure, and Midnight’s backpack is a small bag of holding. If the players keep the stolen goods, the Old Watch’s opinion of the players drops by 7, and the players have disadvantage in interacting with residents of Alteburg for the next 1d4 weeks. If the players return the stolen goods, Mrs Kentworth and the other victims reward them with 300gp. Furthermore, the Old Watch opinion of the players rises by 3, and the players have a permanent advantage on all checks to interact with the gentry and the peerage.
Cleaning Up The Streets
Recommended party level 3

The dragons giving passer by leers in the Red Lantern Warrens, generates using Google Imagen3
Faction Mission
The players are approached by a syndicate footsoldier named Dalgo. The shifty little kobold with the hissy voice says that they have a job offer the players might be interested in. Don O’Malley of the Syndicate has sent him and a couple others out looking for experienced mercenaries to deal with a bunch of upstart punks. This gang, a group of spiked leather jackets and blue jean-wearing young goblinoid punks called The Dragons, has been harassing syndicate operations in the Goblin Market and the Red Lantern Warrens. The Syndicate has tried to deal with them to no avail, with Syndicate arms dealer Grexx being beaten within an inch of his life just the other day by the gang. Don O’Malley says whoever defeats the dragons will get 190gp as a reward, and the person who recruited them will get 5 gp. He asks if the players are interested
If the players agree, they can use investigation checks DC10 to track down the punks to a back alley hideout in the Red Lantern Warrens. They find most of the Dragon’s members inside. A hobgoblin bandit captain named Aiden throws knives at a beat up dart board. 3 hobgoblins named Taog, Roibeart, and Uilleachan lounge about on old couches by the far walls. Rounding out the group is a pair of goblin spies named Eirdsidh and Domhnull playing cards. The punks will first try to intimidate the player characters; they call the player’s characters posers and flunkies of that washed-up old man Don O’Malley. If threats and intimidation do not work, the Dragon’s leader will try to either bribe the players into joining their cause or try to play on the player’s emphatic side; all the members of the gang have suffered at the hands of the syndicate goons. If threats, bribes, or smooth talking do not work, the punks attack the player characters and run away when they hit half-health. Roughing up the punks nets the players 150gp and +3 opinion with the Syndicate.
The commandeered ship
Recommended level 4
Faction Mission
A Trio of rats smugglers, a brooding battle-scared selkie named Feasten, a stuttering halfling with a peg leg named Bernie Warmwater, and human women with a permanent scowl and hook for a right hand named Ida Rosewood to approach the players in a pub or in some back alley with an offer of a job. The Navy has commandeered their ship, the Viper, for use in an upcoming naval invasion of some small island kingdom. Worse, the cargo they were smuggling—about one ton of silk—is still in the ship’s cargo hold. If the players can get the ship back and out of the harbor, they will earn some gold.
The ship is moored at the end of long wharf and is guarded by 12 goblin sailors, 7 marines , and a navy captain (use bandit captain stat block) while it is being converted into a warship.

Fight on the Viper, generated using Google Imagen3
However, the fight and departure of the Viper do not go unnoticed, and as soon as the Viper leaves the dock, a longboat full of marines starts a pursuit. The cutter takes a few minutes to catch up to the sluggish merchant cog, and once it does, the marines lash the two ships together with grapnels and begin to board. Worse, the harbor starts to get rough. The smugglers struggle to keep the Viper on course, leaving the players to deal with marines on the violently pitching deck. The characters must make a dexterity check DC 10 every round, or they will fall prone. There are 10 marines on the deck at the start; until the players dislodge the grapples, 2 more marines will join the battle each round. Once the Viper is safely out to sea, a rat cutter will meet the players with a work crew and paint buckets. The cutter crew will reward the players and ferry them back to shore.
Curse of Nib
Recommended level 2
Improvisation heavy
As the players travel through the Goblin Market, they come across Nib’s Money Changing stand and find it in disarray. Someone has broken into the fortified stone house that contains the stand, beat up Market Master Nib so severely that he lying unconscious on the floor, and robbed him of every last coin and bit of precious metal in the safes.
If the player intervenes, he tells them several of the mercs serving in the Usurper’s army did the deed. He is badly beaten and bruised, but the biggest injury is to his pride and the reputation of the market. Seeing that the players are seasoned veterans, he gives the players the following mission, make each and every one of the men who robbed him pay him back with interest in the form of broken limbs. However, he does not merely want them injured or killed. He wants the players to stage accidents so that he can perpetrate a story about a curse befalling those who violate the market master’s home. He promises he can make it worthwhile if they do it. The players can track the three mercenary by asking around with a cd 15 charisma check.
An accident waiting to happen, generated with Google Imagen3
Ragash Ironfist: A hulking orc mercenary with green skin marred by deep scars is drinking at the rowdy bar called the Drunken Dragon in the lower ward.
- The tavern has a massive, old iron chandelier hanging right over Ragash. If they cut the rope, it would fall right on him.
- The players could spike Ragash’s next drink with a mild poison or pay the server 1gp to do it.
- The tavern’s floor is falling apart; cutting a few boards using carpenter tools would be simple and make him fall into the cellar below.
Thorn Blackeye. A human pirate turned marine, is spending his ill-gotten fortune enjoying the high life, drinking wine, and having a front-row seat at a comedy show at a cabaret in Nachtglanzviertel.
- The theater has multiple spotlights hanging from an unguarded catwalk that can be dropped on Thorn’s head.
- One of the acts is a juggler who juggles sharp objects. The players can toss a knife at Thorn and blame the juggler.
Zellara Voss. A merc who does odd jobs around the city. She is getting herself fitted for a new armor set in the Grand Fey marketplace.
- The armorsmith workshop has an easily accessible roof with a large chimney. Throwing an explosive device down the forge’s chimney would be trivial.
- The armorer is at the bottom of one of the city’s steeper streets, with plenty of unattended carts and wagons. All the players would have to do is unhitch the horses and open the brakes.
- The players can tamper with the armorer’s big heavy sign using carpenter’s tools so that it falls straight onto Zellara’s head.
These are only some of the ways that the players can stage the accident. Encourage the players to be creative with the accident they stage. Once all three thugs return what remains of his stolen money, Nib presents the players with a silver trade bar worth 200gp and becomes a contact.
Debt collection
Recommended level at least 2
Faction Mission
A syndicate foot soldier approaches the players while they peruse the goblin market. Three gamblers have decided to skip out on their tabs at the Stacked Deck, and the Syndicate is currently short-handed. He was sent to find capable mercs in the goblin market. If the players are willing to track down the debtors, they
- The first gambler is Karll Stentz, a human bandit chief hiding somewhere in the dock ward. It takes a DC 10 investigation check to search the docks or a DC 8 Charisma check to ask around for the debtor. The players find him passed out in the Listing Brig in a puddle of his own vomit. The players can easily collect the money due from the debtor’s purse.
- The second debtor is a human noblewoman named Wethofle Duskhammer. She has fortified herself in her rundown mansion in Alteburg. When the players arrive, they find a crumbling ivory-choked palace with an overgrown garden filled with dead flowers, a sign on the rusty gate saying no solicitors, and heavily armed goblins in the garden. Wethofle hired a group of mercenaries to bolster his own force of guards, knowing that the Syndicate would send someone to collect. The mercenaries consist of four goblins led by a hobgoblin who patrol the garden. Once the players are inside the mansion, they are greeted by an entrance hall lit by dribbling candle stubs, filled with a threadbare rug and cracking plaster, and Lady Duskhammer on the balcony. She unleashes her seven remaining guards on the players while ranting about the lack of justice in the city, the weight of Murtagh’s taxes, and her family’s downfall. Once guards are defeated, she hastily hands over the owed money. The players can hear her weeping as they go.
- The third is Captain Snikmore, a neutral evilhobgoblin army captain of the Royal Army. He is currently stationed at the Carrey Batteries but lives off base in a flat in the small neighborhood surrounding the fort gates. It takes a DC 10 investigation check to search the neighborhood or a DC 8 Charisma check to ask around for Captain Snikmorence. The players find where he lives after it would be relatively trivial to corner him on his way to work and intimidate or beat the money out of him.
Completing the quest will net the player 100gp and +2 opinion with the Syndicate.
The delivery
Everyone wants the box generated using Google Imagen3.
Recommended level 5
Faction Mission
A tiefling in the trademark suit and broad-rim hat of a Syndicate captain approaches the player to deliver a message. They have been requested for a job by Don O’Malley by name. They are told to go to Don’s office in the Stack deck for more details. There, he explains that he needs someone capable of defending themselves to collect a sealed wooden box from a smuggler at the southern edge of the dock ward and bring it back to the Stacked deck. They are not to open the box for any purpose whatsoever.
He does not tell the players that the box is the property of Finnolia the fair, that the box contains a little bit of her power or that she has already contacted Murtagh about recovering said box. The box has a tracking spell cast upon it that will lead every patrol in Sliberberg straight to them. The players must navigate the city while they suffer disadvantage on all checks to avoid patrols and all random encounters become encounters with the Usurper’s forces Completing the delivery will result in the Syndicate’s opinion of the players increasing by +5, and the players will be rewarded 250gp as reward and hazard pay.
Disarmed
Faction Quest
Recommended level 3
The players are wandering the Goblin Market when they find a goblin in a leather jacket, white shirt, blue jeans, and multiple piercings hanging by his ankles from the roof of a box wagon that seems to serve as a mobile weapons stall. The goblin is groaning and calling out for anyone to help. If the players cut him down, he introduces himself as Grex Seaxx, an arms dealer and syndicate fixer, as he picks up his sunglasses from the ground. He explains that he got stiffed by a buyer in a late-night deal. The man robbed him of all his merchandise and, to add insult to injury, tied a rope around his ankles and hung him from the roof of the wagon. If the players are willing to do some wet work for him, he can get them magic weapons of their choice for cheap. The man who stiffed him is a bugbear mercenary named Tommy “the Bear” O’Rork. Grex has no clue where he is, but he speculates that if Tommy wanted money, he would rob a bank or hold up a stagecoach. He would not steal the weapons from his stall, so he wanted them for something else.
Finding the Bear
The players can make a DC 15 persuasion check to ask around the city or a DC 17 investigation check to track Tommy the Bear back to his lair. Alternatively, they can leverage faction contacts like the SBHU, the Syndicate, the Rats, or the Old Watch. The trail will lead the players to Carey Head.
Bear Arms
The players find Tommy the Bear and the missing weapons in a rundown rented house on a street haunted by regime soldiers filled with crumbling boarding houses and dimly lit hole in the wall bars in Carrey Head. Tommy is using the magic weapons he stole to arm himself and many hobgoblinmercenaries. Tommy’s little private army consists of himself, who has donned a +1 hide armor suit and 7 hobgoblins armed with +1 weapons.
Rearmed
When the players return the weapons to Grex, he is overjoyed. He promises they can come to him anytime they need a magic weapon and that he will hook them up cheaply. Grex becomes a contact, and the Syndicate’s opinion of the Resistance increases by +6
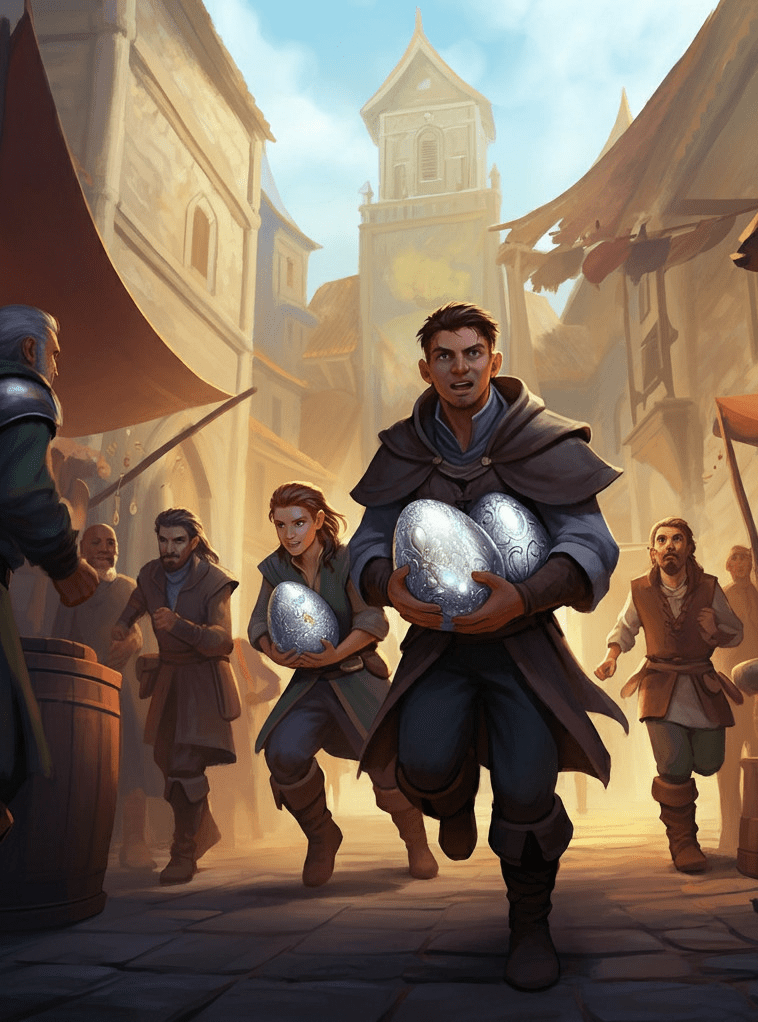
Dragon’s Due.
Recommended level 3.
There is a job posting at the Iron Oak Inn for adventurers to help retrieve some stolen items and to inquire at the Golden Sequoia Hotel for more details. Inquiring at the Golden Sequoia leads them to a young, stiff, and overly formal human noblewoman named Lucilla Silverwing (DC 15 Insight reveals her stiff manner is an act and one she struggles to maintain with occasional slips like a stray giggle or flutter of the eyes). She says she represents Kaida von Silberflügel, a young adult silver dragon who rules a small domain in the mountains north of the city. Recently, Lady Kaida returned from a hunting trip to find her lair raided and her first clutch of 3 eggs stolen. Naturally, Lady Kaida is furious at the theft of her unborn children. Still, instead of encasing this city in frost like an uncivilized white dragon, she has decided to show restraint and hire some capable hands to deal with the issue. Lucilla says her lady did a fly over the city last night, and she could sense her eggs were somewhere in Slibermond. If the players can return her eggs safe and sound before they hatch, Lucilla’s mistress will grant the players one favor whenever they so desire. Unbeknownst to the players, Lucilla Silverwing is actually Kaida von Silberflügel in disguise.
Searching Slibermond
The players will have to hit the streets to find the eggs. If they make a DC 15 persuasion check to ask around in Slibermond, they learn that the Coláiste Draoidheil recently received three silver dragon eggs for their Dragonology laboratory. The check is made with an advantage if the players are in good standing with the Coláiste Draoidheil or Silvermoon Coven.
Retrieving the Eggs
If the Coláiste Draoidheil’s opinion of the resistance is at least +10, the players can ask Gwilym Cwmwllyd to turn over the eggs. If Ulrich has been defeated, he will agree, hoping not to anger a dragon, and personally leads the players to the Dragonology labs to retrieve the eggs. If Ulrich is not defeated, the players will have to deal with the Mage Corp druid who runs the lab and potentially their students(see Coláiste Draoidheil Assassination in chapter 6 for details on the encounter in the Dragonology labs). Otherwise, the players must break into the campus to get to the lab.
Egg Run
Once the players retrieve the eggs from the incubators, they learn they are almost ready to hatch. The players must hurry back to the Golden Sequoia to claim the reward. Start a Timer d8. Each combat encounter or distraction the players encounter ticks the counter down by 1. When the timer reaches zero, the eggs start hatching, and the players must hurry to return to the golden sequoia.
Dialog with A Dragon
If the players return to the suite with the eggs before they hatch; Lucilla is so delighted she inadvertently drops her disguise and reveals her true nature. In this form, Kaida has a personality that is more befitting of a fairytale princess than a dragon; she is playful, charming, and even a little flirty. She apologizes for the deception; she thought the players would not accept her request if she made it dragon form.
The eggs hatch. At this moment, the dragon eggs begin to crack open. There is a touching scene as the wyrmlings hatch, and Kaida greets her newborns with delight.
Discussion with Kaida. Once the wyrmlings are safe, she asks the players what the thieves did to her eggs before the players rescued them. She is intrigued by the research in Dragonology Labs, especially the various wyrmlings of different species playing together. She asks the players if they are interested in an additional reward. If they can recover a copy of the Coláiste Draoidheil’s research into dragon raising, specifically their research into overcoming the natural tendencies of chromatic dragons to be evil, she would give them an additional 90gp.
Entrapment
Recommended level 2
The players encounter a flyer at the Iron Oak Inn. Branagor Stonecipher, a respected local businessman and leprechaun, is looking for capable adventurers. He is the best maker of safes, lock boxes, and home security traps in the city. The products of Branagor Security Solutions can be found in the city’s banks, guild halls, and many of the homes of the city’s wealthiest and most powerful individuals. However, there are specific dark chapters in his long life that he would rather stay buried. Unfortunately, Ulrich uncovered one of these episodes and has proof of the deed. He has been forcing Branagor to work pro bono for him, including but not limited to setting traps in his spire, creating a mechanical training ground for mages, and other darker purposes he refuses to talk about.
Branagor contacts the players and promises them a large sum of gold if they can break into the spire and destroy the evidence Ulrich is holding over him. Branagor has outfitted Ulrich’s spire with multiple traps and can provide the blueprints for each. He also installed a pair of safes in the spire, one in the study and another in the basement; one likely has the folder with the evidence inside. The players must break into the spire and find and destroy the evidence. Branagor will present the players with 400gp upon successfully completing the quest and he will become a contact.
Extermination
Recommended level 5
Faction Mission
An agent of the New Mountainheart Merchant’s Guild contacts the players. The guild recently learned that the rats are planning a large-scale raid on one of their trade convoys. Fortunately, they know that some of the rats’ ships are gathering for their attack on Haigh Island out in the harbor. If the players can board and destroy at least a few of the ships, it would make all the difference whether the convoy survives the ambush.
There are three ships off Haigh Island: a carrack called the Osprey, a cog called the Eel, and a large sloop called the Jackknife. The ships are anchored about 150 yards apart. On the island is a combined shore party from all three ships gathering provisions and ammo from the warehouse hidden on the island.
There are 8 bandits and 6 thugs ashore loading crates and barrels into the boats of all three ships. The crew compliments of the three ships are as follows
- The Jackknife: 1 thug and 13 bandits
- The Eel: 1 bandit captain, 3 thugs and 8 bandits
- The Osprey: 1 bandit captain,5 thugs and 10 bandits
Once the players start a fight on one of the ships, the crew of the other two ships will take notice of the battle in the second round. Both will signal the shore party to drop what they are doing and come to the aid of the boarded ship. The dm will start a timer d4 in the third round of combat. When the timer reaches zero, the shore party joins the fight on the boarded ship. Also, both ships will start to fire ballista shots at the players. On the second round roll initiative for the two unboarded ships. On their turn, they fire ballista shots at the boarded ship. After defeating the pirates on one of the ships, the players can choose to board another.
After defeating the pirates, the guild member will award the players 300gp, and the guild opinion of the resistance will increase by +5, while the players’ rat opinion will decrease by -4.
The extortionist
Recommended level 3
Faction Mission
While the players are traveling through the Grand Fey Marketplace, they are approached by a dwarf watchman who holds up a sketch of a man who, the watchman says, is wanted for grand theft and asks if the players have seen him. Regardless of what the players answer, the watchmen insist the players keep the picture, and there are more details on the back before walking away. On the back of the sketch is one of the symbols of the Old Watch and a request to meet at the alley behind Otto’s Organ Repair. When the player arrives, they find the same watchmen, nervously standing in a puddle of darkness, looking this way and that as if looking for invisible spies. He introduces himself as Commander Ironshoal’s nephew Veit and tells the players he needs help.
He tells them that one of the new watch officers brought in by Cairbre is abusing his power. He and his cronies have been falsifying evidence to extort money from people in Steihalfer. The top brass does not care enough to stop him, and the Old Watch cannot do anything to stop him, or else they would have expose the corrupt officer themselves. Veit provides a sketch of the officer in question and promises a reward if the players deal with him.
The players can find the watch officer by making a DC 14 Charisma check in the neighborhood. The officer is a hobgoblin watch officer with four watchmen in support. They will not be swayed by the words of wanted rebels and will require a good beating to stop their criminal acts.
After dealing with the corrupt officer, the players will receive a note via dead drop with directions to a stash of 125 gold pieces. Old Watch opinion increases by +4
Feeding the masses
Recommended Level 2
Faction Mission
When the players have a free moment in their safehouse, Tansy approaches them with a request. She needs someone to escort several of her apprentices and two wagons full of bread as they make deliveries in several of the city’s poorer neighborhoods. Several of the city’s least savory outlaws have been emboldened by the watch’s focus on the resistance, and the bakery’s magic bread is worth quite a pretty penny to specific individuals she will not name. The last delivery was attacked by highwaymen, from which her girl barely escaped with their lives. If the players accept the quest, they will ride on the wagons as the apprentices make their deliveries.
Not long after the wagons leave the lower city, a gang of 4 bandits riding on riding horses give chase to the wagons. The players must fend off the highwaymen while riding on the delivery wagons. The wagons are swaying about on the cobblestone road, so the players must make a DC 7 dexterity check to stay on top of the wagon each round. Furthermore, At the DM’s digression, the wagon will travel under low obstacles that will cause 1d4 bludgeoning damage to any character standing on top of the wagon.
After the highwaymen attack, the deliveries seem to go well until the fourth delivery, when the players find themselves surrounded by five thugs who demand the player’s hand over the rest of the cargo in the wagons or die.
If the players successfully fend off the two bandit attacks, they earn 40gp and a coupon for the café. The coven opinion of the players increases by +
Fire of War
Recommended level 3
Requires resistance reinforcements.
The players learn of this quest via contacts in the rats or the New Mountainheart Merchants guild. The city of Cinderport on the island of Dunklemeer is across the Feyglimmer Sea and is well known for its alchemical industry, especially the production of alchemist fire. Murtagh has ordered an entire ship full of alchemist fire ballista bolts and catapult ammo for the Royal Army. The boat will arrive in 4 days and be unloaded the night after arriving.
Fireship
On the night of the fourth day, the players arrive to find the ship with the alchemists’ fire bolts swarming with laborers and soldiers. Twenty commoner laborers are working to unload the ship, while 7 marines and 6 sailors are guarding the dock and the wagons. The moment combat begins, the laborers scatter in every direction.
Volatile cargo. The alchemist fire in the crates is volatile, and the shells and bolts are fragile. It only takes a good sharp shock to set the contents of the crate alight. Also, the laborers left the crates all over the dock and ship when they fled. If the players miss an attack while adjacent to any of the crates being unloaded from the boat, roll a d4; on one, the crate explodes in a spray of burning liquid that can cover a 5-foot diameter radius. If a crate is located in an area of effect for a spell that deals damage, it will explode, dealing the specified amount of damage.
Treasure: The players can claim up to 150 crates of alchemist’s fire ammo minus the number that burst into flames. Each crate contains 4 catapult shells or ballista warheads filled with alchemist’s fire.
Fish Tale
Recommended Level 3
While the players wander the dock ward, they are approached by a group of nervous fishermen. They are old, weathered seamen dressed in rough woolen clothing but seem genuinely spooked. One of the fishermen, an old, nearsighted dragonborn named Greethen Imbixtellrhyst, tells the players of a strange encounter they experienced the previous night. They were fishing near Sullivan’s bank beyond the harbor very early in the morning and noticed weird lights beneath the water. Suddenly, a massive fish-shaped object with glowing eyes passed underneath their boats, tearing up their nets and tearing a gash the width of a palm through one of their boats. The fish then swam off towards the harbor. The fishermen are too afraid to return to sea until they know what they saw is gone.
Investigation
The players can question the locals with a DC 17 charisma check. Dozens of people saw the lights in the harbor. The consensus is that they were heading towards the city’s shipyard.
If the players inspect the damaged boat and make an Investigation Check (DC 15), they realize that something sharp and metallic caused the gash in the hull. If they make a DC 15 arcana check, they detect faint magic emanating from the gash.
The players can stake out the harbor using a DC 15 perception check. If they succeed, they spot the lights heading towards Stoneforge and Ironhelm shipbuilding and disappear by a large shed by the fence on the western side of the complex.
Workshop #4
Workshop #4, generated with Google imagen3
The creature disappeared into a workshop at Stoneforge and Ironhelm shipbuilding shipyard (See Chapter 5 for more info on the shipyard). The workshop in question is called Workshop #4, and it is a laboratory where some captive gnome tinkerers are being forced to work on new weapons for the navy. The workshop is heavily guarded. There are six marines patrolling the workshop’s exterior and another five marines inside. If the players start a fight with one group of marines, start a timer d4: When the timer reaches zero, the other marines join the fight.
Inside: Inside the workshop, the players find the massive bronze shark suspended from an assembly gantry hanging from a track in the ceiling. Four gaunt and dirty-looking gnome tinkers work on the shark with wrenches and hammers. When they notice the players, they are overjoyed; they were kidnapped weeks ago and forced to work on weapons for the navy. They want the players to lead them out of the shipyard, but first, they must destroy the workshop and the Bronze Shark. To do so, they will need a barrel of black powder. There are barrels of black powder in one of the warehouses. If the players bring back one barrel of powder, they can blow the bronze shark on the smithereens.
If the players successfully deal with the Brozen shark and Workshop #4 the fishermen and the freed tinkers give the players 50gp and a grappling crossbow.
For Science
Recommended level 3
Faction Mission
One of the graduate students at the Coláiste Draoidheil, a halfling named Glim Lingenhall, approaches the players in Slibermond. The watch recently confiscated some of the equipment for his thesis project right as he was close to a breakthrough. The piece of equipment in question was thaumagraph with a wild magic condenser. He describes the device as a tripod with a box on top with wires and things sticking out of it. The equipment is being stored in a T in the Dock ward.
Flying colors
Recommended Level 5
Faction Mission
The players receive a message from The Grand Absurdist written in flowing calligraphy on fancy stationery. She commands the players to fly a massive banner off the top of the lighthouse on Carrey’s head in exchange for a reward. However, the lighthouse is part of the Carrey batteries. The players must find a way to sneak into the fort and the lighthouse.
Successfully completing the mission will reward the players with 200gp in random bits of broken costume jewelry, broken weapons, flagons, and 4 vials of Befuddle Gas. Droll opinion of the resistance rises by +5
The Fuel of War
Recommended Level: at least 2
Repeatable
The regime has established several alchemist workshops across the Grand Fey marketplace, the dock ward, and Tannery Row, where they produce potions and concoctions to support their military efforts. In addition to providing healing potions to the Royal Army, the labs have stockpiles of expensive and rare ingredients for various magic items. They are heavily guarded, but the risk is worth the reward.
Alchemist Labs
The alchemy labs stand out like scars on the whimsical cityscape. Each one is a squat, windowless block of grim, soot-stained grey masonry topped with crenelations and draped with orange and black banners. The players only need to ask around to find each of their addresses. Inside, each lab has a relatively similar layout. An 80-by-80-foot space with several rows of alchemists’ workstations, cauldrons, and various alchemical reactors. Shelves of ingredients and reagents line the walls.
Enemies. The number of enemies in the labs can vary wildly depending on the time of day. During regular working hours, the labs can have up to 1d8 alchemists \ at work. At night, the number of alchemists in the building is 1d4. 1d4 infantrymen are also present, standing at the entrance to the laboratory.
Fragile equipment.The alchemical equipment in the labs is fragile and susceptible to damage. It shatters if something is pushed into or hits the equipment (such as an attack missing or a vial being thrown).
| 1 | Deals 1d4 fire damage in a 5-foot radius. |
| 2 | Creates a smoke screen in a 5-foot radius, providing concealment. |
| 3 | Paralyzes anyone in a 5-foot radius for a brief duration. |
| 4 | Doubles fire damage in a 5-foot radius for a limited time. |
| 5 | Heals 1d4 hit points in a 5-foot radius. |
| 6 | Blinds anyone in a 5-foot radius temporarily. |
.
Rewards: Upon looting one of the alchemist labs, the players discover a trove of valuable spoils, including:
- 1d4 crates containing 16 potions of healing each.
- 1d8 uncommon potions
- 1d12 common potions
- 1d8 Alchemists, herbalists, or poisoners kits
- Various manuals detailing potion recipes.
- A mysterious bottle labeled Experimental Substance X a potent drug with both beneficial and detrimental effects. When ingested, it increases strength, constitution, and dexterity by 2 but decreases intelligence, wisdom, and charisma by 2. The drug lasts 4 hours
The royal alchemists at work, generated with Google imagen3
Development
The successful raid on one of the alchemist labs has significant repercussions:
- With each successful raid, the Royal Army deploys 2 additional infantrymen at all alchemy labs.
- If the players do not destroy the raided lab, the army restores it to functionality within 1d4 days.
The Golden Opportunity
Recommended Level: at least 2
Repeatable
Ulrich has a working lunch at the steakhouse of the Golden Sequoia, a luxury hotel in Fairy Court, every Wednesday. He invites the other top commanders in the city to dine with him, and some of them usually come to partake in the luxurious food. This recurring meeting is ideal for gathering intelligence on the regime. One problem, however, is that the steakhouse only allows noblemen and wealthy merchants to eat there.
The Golden Ticket
There are several possible ways in which the players can infiltrate the restaurant. Some strategies include.
- Fake Nobility: A player could impersonate a member of a noble house to gain entrance. The players must succeed on two DC 20 sleight-of-hand checks to create documents with a forgery kit and a disguise with a disguise kit. The undercover player must also succeed on a DC17 charisma check to blend in.
- Reserved Table: If one of the players is of noble descent, they could reserve a table at the steakhouse under their name. However, this could prove risky because the players are wanted fugitives.
- Disguised Staff: The players could infiltrate the steakhouse by disguising themselves as wait staff or other employees.
- Magical Eavesdropping: If the players have access to magical abilities or items.
This encounter is designed as a sandbox, allowing the players to approach the situation creatively and explore various strategies for infiltration. You are encouraged to let the players try any method they believe could work, rewarding clever thinking and improvisation.
High Stakes, Medium Rare
When the day of the meeting comes, it is up to the players to put their plans into motion. As expected, Ulrich and 4 other commanders and lieutenants are at the restaurant. The players must discreetly listen in on the conversation. A DC 15 Perception check is required for them to successfully hear and understand one true piece of intel. However, Ulrich and his guests are not fools. If the players make more than two Perception checks in a row, they will get suspicious. The players can throw off suspicion by making a DC 14 stealth check to look innocent, a DC
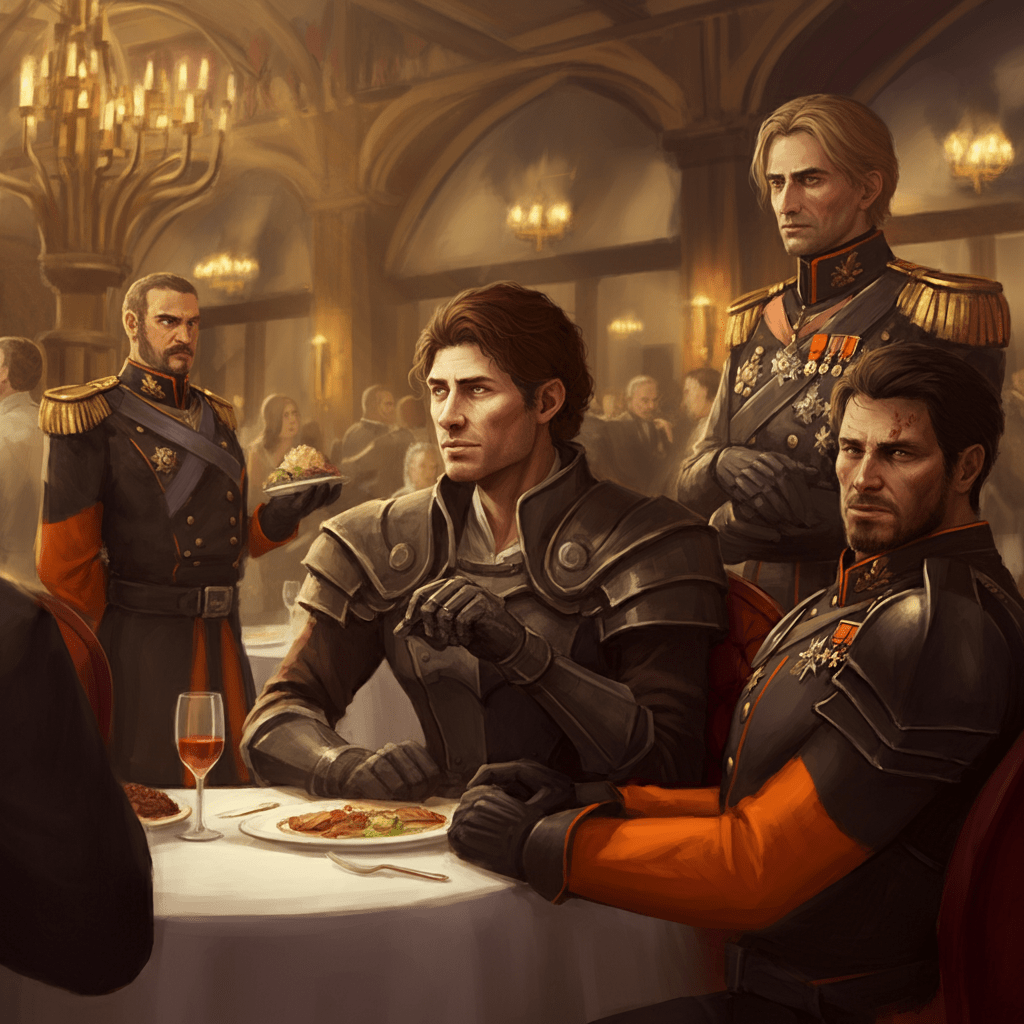
The dining room of the Golden Sequoia, generated using Google Imagen3
10 Charisma check to make appropriate idle conversation, or suggest some other action not requiring a skill check.
If the players fail to draw suspicion away from them, you, the DM, will have to play the encounter by ear, depending on their cover, their actions in the restaurant, and which commanders are present.
Gentrification
Recommended level 1
Faction Mission
The players are approached by a young dwarf in fancy clothing. He introduces himself as Oskar Stoughtale, an entry-level New Mountainheart Merchant’s Guild member. He heard of the players’ abilities and wants them to help with a redevelopment project. He recently bought some blocks of property in The Grand Fey marketplace, surrounding the gate leading to Nachtglanzviertel . He hopes to build upscale flats and shops to exploit the Nachtglanzviertel artist and nightlife scene. However, the residents of the blocks in question are not willing to leave despite his offers of compensation. He wants the players to convince these residents to vacate the premises by any means necessary. When the players arrive, they find a thriving working class community insistent on not leaving their homes, so insistent that they try to run the players off. The players will have to resort to some combination of intimidation, arson, deception, and violence to drive the residents out. The dm should allow the players to try any plan that has a reasonable chance of success. If the player’s plan fails, an angry mob consisting of 50 commoners will descend on the players from all directions and try to kill them or run them out of the neighborhood.
After driving out or killing the residents, the guild member will award the players 100gp. The guild opinion of the resistance increases by +3, and the Silver Moon Coven and Sanctuary of the Resplendent opinion of the players decreases by -4.
The Golden Parachute
Recommended Level 4
Bank fight, generated by google imagen3
Faction Mission
Requires reinforcements
The players receive a message via courier from Aoife Goldspire. The message is an urgent request for help from resistance. She has heard from a source in the government that Murtagh is about to nationalize the bank to pay for his wars of conquest. In this context, nationalization means stealing all the money in the bank. She needs the players to fake a break-in by the resistance so that she can move the money from the vault to a safer location. Notably, the players must do the fake break on the day of the transfer to make it convincing enough to Murtagh and Cairbre. She does not know how many troops will be sent to the bank; she knows there will probably be a lot. She promises to make the farce worth their while.
It is up to the players to gather a sufficiently large force of Resistance fighters to fake the bank robbery and devise a strategy to fight the army forces. On the day of the theft, 1d20 infantrymen and another d20 skirmishers arrived with a dozen wagons to empty the vault. The players and their fighters must fight off the army forces while at least some resistance loads up the gold into wagons provided by the guild.
Completion of the task will get the players 300gp as a reward and increase the guild’s opinion by +4
Hag Time Blues
Recommended level 3
As the players make their way through the goblin market, they are called out by a teenage girl in an almost stereotypical gypsy costume. The girl beckoned them into a large stall tent practically garish in its decorations. It included a towering animated magic neon sign proclaiming that the tent is Elina’s Hex Be Gone. Once inside, she reveals that she is the owner of the stall, Elina Foul and that she is a teenage green hag. She tells the players that she hates being a hag, she does not have the knack for being evil, she can’t curse people for the life of her, and worse, at least in her mother’s eyes, she likes flowers, unicorns, and frilly dresses. She has been working on a treatment to dehaggify herself so that she can be the girl she always dreamed of being. She almost has the formula perfected, but she needs a single Moonpetal flower from the botanical garden in Fairy Court Park. The problem is that the park’s denizens have a no-hag policy and chased her out of the grounds. If the players can help her, she promises them she can make it worth their while.
The players have no trouble finding the botanical garden at Fairy Court. However, now they must identify the flower from dozens of different species in the garden. They must make a dc 16 nature check to find the right flower. When they pick the flower, they find themselves face to face with a druid gardener and five sprites, who ask pointedly why they had plucked such a rare flower from the garden. The players must either be clever with their roleplay or be quick on their feet to escape Fairy Court.
Upon returning to Elina’s tent in the Goblin Market, she asks them to wait while she finishes the potion. The players hear some pops, bangs, and poofs from within Elina’s potion room, followed by some silence. A few minutes later, Elina emerges and is almost entirely unrecognizable. She still has green skin, but her face, hair, and physique are stunningly beautiful. She asks what the players think, and regardless of what the players answer, she thanks them vigorously. She knows that players are the leaders of the resistance, so she offers herself and the contents of her potion shop as their reward. The players gain 10 potions of healing 50gp, 6 bottles of Elina’s Brew, and Elina Foul as a resistance member.
Hijacking Endeavor
Recommended level 3
Faction mission
A brand new and nearly ready-for-service war galleon named the Endeavor is moored at the Stoneforge and Ironhelm shipbuilding’s fitting-out wharf while the final bits of hardware are installed onboard. Both the Rats and NMG are interested in hijacking the ship. The Rats want to use the vessel to break the blockade around the city. The NMG seeks to claim the ship as a heavy convoy escort and merchantman. Both factions are willing to pay handsomely to the resistance if they deliver the ship to them.
Infiltrating the yard: The players must gather a crew to man the Endeavor. Fortunately, the rats and the NMG are willing to loan the players an experienced crew if needed. The players will then have to figure out a way to infiltrate Stoneforge and Ironhelm shipbuilding, with the 20-30 sailors required to man the ship; details on Stoneforge and Ironhelm shipbuilding and the navy garrison at the yard are detailed in Chapter 5.
Stealing the ship. Once the players infiltrate the yard and deal with the marine detachments at the fitting-out wharf (see area 6), they find a new complication. The ship is mere hours from being ready for duty. 8 sailors under the comand of pair of bosuns are on board the ship, helping to install the final bits of hardware, including the ship bell (add more sailors if the players bring resistance fighters or faction sailors to the fight). The players must fight the sailors and keep them ringing the bell to bring in reinforcements. If the enemy sailors ring the bell, start a timer d4. When the timer reaches zero, ID4 enemy marines join the battle.

The Endeavor, as it runs the blockade, generated with Google Imagen3
Running the blockade. Once the players steal the ship, things escalate quickly. They must run the blockade outside the harbor to deliver the boat to either faction. A character with proficiency in water vehicles must pilot the ship out of the harbor and to the rendevous point. However, one of the Navy’s converted merchantmen is blocking the Endeavor’s path out of the harbor. Despite the merchantman’s awkward conversion, the ship is still fast enough to chase down the Endeavor. The players will have to fend off the pursuing ship long enough to reach the rendevous
Reward. Successfully completing the quest results in the faction giving the players 300gp and their opinion of the resistance going up by 3
Hostile Takeover
Recommended level 2
Faction Mission
A New Mountainheart Merchant’s Guild agent stops the players in the street with an urgent request. She introduces herself as Amelia von Breidenbach, and she wants to hire the players. She has been dealing with a rival non-guild merchant named Greta Stahl, who is driving her out of business. She wants the players to go to the merchant’s warehouse in the docks and destroy as much of the merchandise as possible; she does not care how you do it, it’s just that they do it. Unbeknownst to her or the players, Greta is doing so well because she supports the new regime and has been supplementing her trading house’s income by importing equipment for the Royal Army.
The warehouse is protected by a force of 5 guards.
The players find enough arms and armor inside the warehouse to outfit a battalion of soldiers. Before the players can take or destroy any equipment, Greta(use noble stat block), and 7 army skirmishers walk into the warehouse; upon recognizing the players, the skirmishers attack while Greta flees to get reinforcements. Start a timer d6. When the timer reaches zero, 8 infantrymen will arrive at the warehouse to apprehend the players. The players must collect or destroy as much of the warehouse’s contents before the overwhelming force of reinforcements arrives at the scene.
After completing the task, Amelia rewards the players with 200gp and lets them keep any of the merchandise they stole from Greta.
Hound Dogged
Recomended level 1
While the players travel through a sufficiently secluded part of the city, they are approached by Branwen, an awakened rough collie who works for the Sliberberg branch of the Society for the Human Treatment of Awakened Animals. She has a mission for them from Society, saying that word on the street; they are the ones to go to when dealing with specific problems with the regime. For some reason, Murtagh has developed a sudden hatred for awakened animals. He has sent guardsmen with nets, ropes, and cages out into the city to catch any awakened animals they find and bring them to a warehouse in Tannery Row. She promises that the players will be compensated well for the risk and that the awakened animals of Sliberberg will surely lend the resistance a paw.
The pound
The pound is a large rundown wooden warehouse with warped walls coated with peeling paint and the words Dunmore Sausages stenciled across it in fading red letters. The complex is surrounded by a broken-down fence. Even from a distance, the players can hear manic barking mixed with cries for help. The building is guarded by 8 guards. 4 patrol the exterior, and the other four await inside the makeshift pound. There are also two mastiffs on leashes, one in the building and one outside the pound’s front door. The pound is rigged up with a crude mechanical alarm system. Stepping on trip wires in the doorways leading into the pound triggers the alarm. If the players trigger the alarm start a timer d4. When the timer reaches zero, a patrol from the Royal Army enemy table arrives at the pound to investigate. Inside, the players will find rows of small cages stacked several cages high. The cages are, of course, locked, but the guards each have a set of keys. If the players successfully release the animals at the pound, Branwen reappears with a small coin purse in her mouth. The coin purse contains 25gp. The player also discovers the city’s enormous population of awakened animals is firmly on their side. Awaken animals will now aid the players in combat at the dm digression and serve as informants. The player can spend 5 minutes searching a neighborhood to find awakened small animals that will tell the players what bits of information they picked up from the city.
Identity Crisis
Recommended Level 3
An high elf thief is loose in the city, stealing faces off the well-to-do in Alteburg and leaving almost featureless faces in his wake. Both the Old Watch and the SBHU want this man captured, and for the bounty hunters, it’s personal; one of their own has been a victim of the thief. The city is covered in bounty posters with a 400gp reward for capturing the Face Taker, and members of the Old Watch drop hints to the players that capturing the Face Taker is a priority. However, it will not be easy; the face taker is a smooth operator, according to the victims’ testimonies. He first knocks the target out before taking their face, and every victim reports seeing a different person knock them out, so the thief is using the faces he stole to stay anonymous.
Hunting the Face Taker. To hunt a thief who uses stolen faces to commit his crimes, the players must hit Alteburg’s streets. Despite the thief’s precautions, there are ways for the players to corner him.
- With a DC 17 charisma or persuasion check, the players can ask if any ward residents have seen known victims acting strangely in the last few days.
- The likeness produced by the magic item the thief uses to impersonate others is not perfect. By making a DC 18 perception check, the players can patrol the ward on the lookout for the faint telltale signs that a person’s face does not belong to the one wearing it.
- Dispel Magic can also be used to quickly check a potential suspect.
Confronting the face taker. The players find the face stealer stalking the crowds along Alteburg Street, almost right outside the old castle. He wears the face of a notable merchant as he looks for a new victim. The players can confront him on the street or follow from a distance. If the players try to confront him on the street, he will start running, hoping to change his face or use his magic to escape, thus forcing the players to start their search again. The dm will start an urban chase using the chase rules in the DMG. If the players decide to follow him to his next victim, have them make a dc12 stealth check. Tailing the thief will eventually lead the players to the home of Lady Wasanthi, a spinster and member of the gentry. The thief will attempt to talk his way into Lady Wasanthi’s home to steal her face. It is up to the players to wait until the thief starts stealing Lady Wasanthi’s face or warn her before the face stealer strikes. Once the players have cornered the thief, a combat encounter begins. The thief uses the stat block of a mage.
Reward. The reward depends on which faction the players take the thief to. The reward is a favor if they bring the thief to the Old Watch. The watch will raid the thief’s hideout and find dozens of stolen faces. If the players turn the thief over to the SBHU, they earn the bounty reward and respect from the union members. Over the next week, the union makes a mint by returning the faces for a small fee. Regardless, the players get the thief’s mask of many faces, and both faction’s opinions of the players increase by +5
Ironshoal execution
Recommended level 5
Faction Mission
Requires Reinforcements
Corporal Knobs approaches the players and quickly ushers them down an alleyway. He is in a near panic and speaks franticly without pausing for breath. He tells the players that Commander Ironshoal, the watch commander before Cairbre was made commander, will be executed in Radiant Court in three days for not supporting the Usurper. All the members of the Old Watch want the resistance to help free her from Cairbre’s clutches because they don’t have the manpower to effect a rescue. Even if they did, they could not save her without jeopardizing their mission to prevent the watch from committing too much harm. It will be entirely up to the resistance to stop the execution.

The Execution ground, generated using Google Imagen3.
When the day of execution arrives, it is accompanied by dull, lifeless, overcast skies and a cold drizzle. A skeletal scaffold of dark wood has been erected in the middle of the plaza. Standing in hushed silence in neat rows are 20 watchmen, 3 watch officers, and a dozen infantrymen. The players must devise a strategy to keep the guards occupied while rescuing Commander Ironshoal from the gallows.
If the resistance pulls off the rescue, commander Ironshoal gives the players a suit of uncommon magic armor (dm choice). the Old Watch’s opinion of the players increases by +10
Jailbreak
Recommended level 4
Faction Mission
Over the last few months, dozens of members from the various factions in the city have been arrested and locked in the city jail along with dozens of other innocent and not-so-innocent people. If the players free these people, the factions would be in their debt.
The reward and opinion changes for this quest depend on who the players free from jail
- If they free syndicate lieutenant Rory “The Hammer” Flynn and his men, he will reward the players with 100gp from his emergency funds. The Syndicate’s opinion of the players will increase by +3, and the Old Watch, the Silver Moon Coven, and the NMG’s opinion will decrease by -3.
- If they free the bounty hunter scouts, Cassidy Rose will gift them 50gp each, and the SBHU opinion of the resistance will increase by 4.
- If they free the wrongly imprisoned civilians and or the family members of the political prisoners, the Silver Moon Coven and the Sanctuary of the Resplendent Hands opinion increases by +4
- If they free the members of the drolls, they receive 100gp worth of random junk as a reward from the Grand Absurdist. The droll’s opinion increases by +1d4, and the opinion of every other faction falls by -4
- If they free the merchant prince or the members of the nobility in Solitary Confinement, the NMG opinion of the resistance increases by +3, and the guild rewards the players with a gold trade bar.
- If the players free the smugglers from the rats’ the Rat King sends a thug to deliver the players a purse containing 300gp. The Rats’ opinion of the resistance increases by +2, and the Old Watch, the Silver Moon Coven, and the NMG’s opinion of the resistance decreases by -3.
- If the players free the Political Dissidents, the Coláiste Draoidheil opinion of the resistance increases by +3, and they donate 5 spell scrolls with cantrip to level 3 spells to the cause.
- If they free Commander Ironshoal, the Old Watch’s opinion of the resistance increases by 7, and they pool their money to give the players 300gp as a reward.
The King’s Gambit
It is recommended that the players have time to establish the resistance and recruit several resistance members before introducing this side quest.
Fredrick’s fate.For the last few months, Fredrick has been subjected to constant torture in a bid to uncover several secrets he holds. However, Murtagh greatly underestimated how broken Fredrick was emotionally before the process started, and the continual torture has caused Fredrick to emotionally and mentally shut down. With Fredrick seemingly no longer able to tell him what he needs to know, Murtagh has decided to present Fredrick as a gift to Fredrick’s old enemies, the fey soverignAilénach An Draíocht as a gift. He hopes this will be the first step to establishing diplomatic ties with the famously moody and grim fairy queen. Tansy has gotten wind of this plan and approaches the players when they return to one of their safehouses and requests that the players rescue Fredrick. They have 3 days to prepare for the caravan departure to transport Fredrick to the Ailénach’s domain in the curse marches.
Fredrick last ride, Generated using OpenAI DALL-E
The Prisoner Caravan. On the night of the 3rd day, under a cold and drizzling sky, the black prison wagon drawn by 4 draft horses departs from Castle Sliberberg. Inside lies a battered and bloody Fredrick wearing clothes have been torn to rags and who has been shackled hand and foot with dull black iron chains. Murtagh is not taking any chance with the players loose in the city. The wagon has a massive escort of infantry marching alongside it. The exact numbers depend on the resources the players can bring to the fight. You should aim for a challenging encounter for the players, even if they bring resistance members along as reinforcements. For example, for a level 2 party with 5 resistance fighters, I would suggest 7 infantrymen and 5 skirmishers.
It is up to the players to figure out how to stop the caravan and free Fredrick. The caravan will go along the dark and abandoned streets of Alteburg, the Grand Fey Marketplace, and Slibermond on its way out of the city to the bridge over the Sliber Gorge, where a large escort of knights awaits. When the player’s attack, the wagon driver will attempt to flee along the route assigned to the convoy. If the wagon leaves the city, then the quest ends in failure. Also, if the fight starts to go wrong, at least one of the enemies will try to go to the nearest alarm bell.
The Lame King. When the players free Fredrick from the prison wagon, they find him in terrible shape. His once impressive muscles have atrophied into nothing; he is covered in scars, barely conscious and delirious. The players will have to carry him to safety. It takes a DC 17 athletics check to carry the king.
Development. Successfully rescuing Fredrick leads to the Long Road to Recovery sidequest.
The Last Laugh at Jojo’s
Recomended level 3
Murtagh’s men raided and closed Jojo’s Komedy Klub in Nachtglanzviertel after a prominent comedian poked fun at the new regime live on stage. The club’s namesake, the mischievous Jojo the halfling, approaches the players and asks them to help. The regular cast of comedians have been suffering from a prolonged build-up of pensive energy and need to release their comedic chops on stage, or else they will go insane. However, they know that opening again will cause the watch to raid the club again. They want the resistance to provide security for the club while they do one last show before making it like a banana and splitting town. The show will be held later that day.
When the players arrive at the club, they find it lit like a Christmas tree despite the building covered in graffiti and several of the smashed windows being replaced with wood. The magicly lit marquee flickers and sparks erraticly. There is a large crowd of eager yet on edge patrons waiting at the front door. From admist this crowd Jojo shouts at the plaeyrs and tells them the watch will be here soon; it will be a 1-and-a-half-hour show, so they should expect a marathon of battles with the watch. Not long after speaking with the players and letting the patrons in the first group of watchmen arrive, the players will have to fight off waves of watchmen in one long battle. When a wave starts, a timer d6; when the timer reaches zero, the next wave arrives. The waves are as follows.
- 7 Watchmen
- 4 Watchmen and a 2 riot watchmen
- watch captain
- 5 riot watchmen assault variant
After the last wave, no more watchmen arrive to try to break up the club’s performance. At the end of the show, Jojo awards the players 100gp and a wand of smiles.
Legend Tripping
Recommended Level 2
When the players are out one night in the city, likely somewhere in Alteburg or the Lower Ward, they encounter a strange-looking man. The human man is about 25, with a slightly disheveled appearance, carrying an array of strange gadgets that click softly as he moves them back and forth. If the players ask what he does, he introduces himself as Simon Quil, an “expert” in the paranormal. He is researching the city’s best-known paranormal phenomenon, the Silver Lady of Sliberberg. If the players ask what the Silver Lady of Sliberberg is, he tells the players the story of a charming elven princess with brown hair wearing a torn and water damaged wedding dress who appears at night in places all over the city. He asks the players if they would like to help with his research, and he is willing to pay them for their help. If the players accept the quest, he gives them one of his ghost detection devices and tells the players that among the ghost’s favorite haunts is Fairy Court, the area around Elmwood Hall and Market Grove Bazaar.
Investigating the three sites
When the players arrive at one of the three investigation sites, they must make a DC 15 arcana check to determine how the ghost detection machine works. The machine works like a divining rod; it clicks faster when pointed in the direction of a spirit. Alternatively, they can ask around the area with a DC 12 Charisma check to learn the local lore about the Silver Lady.
Market Grove Bazaar
- Device. The device shows no reaction while in the marketplace.
- Lore. The Silver Lady appears at night in the bazaar. She typically appears near the fountain or at vendors’ stalls selling jewelry and art.
Elmwood Hall
- Device. The device shows a weak reaction while in the theater.
- Lore. Since the theater first opened, there have been multiple sightings of the Silver Lady. The Silver Lady likes to show up at the opening nights for new plays or musical acts in Elmwood Hall and the neighboring music halls and theaters.
Fairy Court
- Device. The device has a strong reaction while in the marketplace. The players can follow the machine’s response to find the Silver Lady sitting on a park bench by the park’s central fountain and looking up at the stars. Refers to the Silver Lady of Sliberberg entry in the Oddities chapter for how the encounter unfurils.
- Lore. The Silver Lady likes to walk the paths of the botanical garden and Fairy grove.
Upon returning to Simon after their encounter with the Silver Lady, he gets excited and peppers them with questions about the encounter. When he is through, he hands the players a check for 250gp from the Goldspire bank.
A Letter from the Past
Recommended Level 2
To start this quest, the players must complete the King’s Gambit quest, restore Fredrick to bodily health, and encounter the Silver Lady of Sliberberg at least three times.
The Silver Lady of Sliberberg manifests in front of the players. Unlike when the players typically meet her, she seems more solid than usual, and her eyes have an air of emotional conflict. She then gives the players a letter and tells them to deliver it to King Fredrick. She insists that she knows Fredrick well and that he must learn certain truths about the kingdom uf they want him to be fully healed. If the players inspect the content of the letter. In that case, they will find a fancy piece of stationary with illegible writing and hear a whisper that it will remain unreadable until Fredrick reads the letter.
Fredricks reaction. Upon reading the letter, Fredrick falls to his knees and starts to sob uncontrollably while clutching the letter to his chest. Between sobs, he mutters about her being alive and all these years, she was right under my feet the whole time. Once he has recovered enough of his composure, he demands the players arrange a meeting between him and the Silver Lady of Sliberberg at Lovebird’s Terrace, explaining that the Silver Lady of Sliberberg is his long-lost wife.
The letter. If the players manage to pry the letter from Fredeick’s grasp and read it, they realize it is a heartfelt message from Fredrick’s long-lost wife, Aoibheann. It explains everything that has happened since Drowning of Mountainheart, how she was transformed into the essence of the kingdon itself, and how, by the time she gained enough control over her powers to communicate, Fredrick had already fallen into his cycle of depression. She explains that she did not make herself known because she was afraid that he would not love her in this form or, worse, that would have given him false hope that she could be restored to how she was. She also explains the consuming guilt she has had all these years that a wish she made during the disaster may have caused their transformations. She still loves him, but she also wants him to be happy. She encourages him to forget about her and find someone new.
The Lady Protests. When the players go out to try and find the Silver Lady to ask her to meet Fredrick, she is nowhere to be seen. She is not one of the usual haunts around the city. The players must make a DC 20 investigation check to track her down. They find her late one night at a scenic overlook of Sliber Gorge, looking up at the stars, conflicted and thinking aloud about whether sending the note to Fredrick was a good idea. When the players ask about her and Fredrick’s meeting, she is hesitant. She wanted the note to be the impetus for Fredrick to move on with his life, but now it seems it redoubled his efforts to restore her to her old form. It will take a dc18 persuasion check, deception check, or charisma check to convince her to meet Fredrick.
Two old Flames reconnect. When the players arrive at Lovebird’s Terrace with Aoibheann in tow, they find that Fredrick has already claimed a table overlooking the city below. He asks if the players can be his wingmen and to ensure that the watch does not interfere. Fredrick and Aoibheann sit down there, and there are a few moments of awkward silence between them; both are worried about what the other thinks of him or her after so long away. Fredrick breaks the silence by breaking into tears, says he misses her so much, and tries to embrace her ethereal form. He says that she no longer needs to hide from him; he loves her no matter what form she is in, and he promises to find a way to return her to her old self. Aoibheann sighs. She loves him too, but she also wants her to be happy; obsessing over her for centuries was unhealthy for him, and she does not want him to obsess over restoring her to a form that will allow them to be together. He should forget about her and find someone new to love. With the two of them at an impasse, it is up to the players to guide the two lovers to a resolution. Does Fredrick move on and look for someone new? Does Aoibheann try to make their relationship work despite her transformation?
Party Crashers. When the couple seems to be working towards a resolution, 6 infantrymen arrive at Lovebird’s Terrace to arrest Fredrick. It will be up to the players to beat the watchmen back while continuing to guide Fredrick and Aoibheann towards a resolution.
Reward. Regardless of whether or not Fredrick and Aoibheann get back together as a couple or Fredrick decides to seek someone new, the players gain the following rewards
- Fredrick’s confidence surges and the dark clouds of depression that hang around him vanish. His emotional healing is complete, and he joins the resistance (See the Long Road to Recovery sidequest). Furthermore, Fredrick promises a large reward for the players once he returns to the throne.
- Aoibheann becomes a contact for the players. She starts to help the players and the resistance in whatever way she can. At the dm digression, players may find random gates and doors they need to get through unlocked, patrol encounters disrupted by wild magic events, or receive other subtle aid from seemingly nowhere, among other things. Aoibheann will also start to leave the players messages in the form of graffiti and signage throughout the city
The Long Road to recovery
Recommended Level 2
After rescuing Fredrick in the King’s Gambit Quest, the players will find that the once mighty fey soverignhas been reduced to a shadow of his former self. He has been broken both bodily and emotionally. If they wish to gain the single best fighter in the city as a resistance member, they must heal him in both body and soul.
Healing the king’s bodily.
To heal the king bodily, the players or another resistance member must make a DC18 medicine check with a healer’s kit or cast a healing spell daily to ensure Fredrick’s speedy recovery through rest and balanced nutrition. The sheer amount of damage Fredrick took means that healing abilities are 1/3 as potent as usual on him and can only be used 1 per day. Once he is returned to full HP, the physical restoration is complete.
Healing the king’s soul.
The coup and the torture have broken him spiritually, leading him to believe he is a lousy king undeserving of love or loyalty. The players must gently coax Fredrick through each stage of his emotional recovery. They can make insight checks to determine the best skill checks and roleplaying strategies for helping Fredrick at each stage of his mental recovery journey (the difficulty of the checks is at the DM’s digression). Fredrick’s recovery rate is at the DM’s Digression. You decide when he enters a new stage of his recovery, although I would recommend him transitioning to a new stage every 2d20 days in-game days of constant successful support and treatment. The stages of the process are as follows.
Withdrawn.
Fredrick starts off withdrawn and unresponsive. He spends every moment of the day in bed, often in a fetal position. When the players enter his room, he weakly insists on being left alone to stew in his misery. When the players insist on being in the room, he spends most of the time staring blankly into the distance, avoiding eye contact with them and giving the shortest possible answers to questions.
Strategies: Charisma DC 20 to show empathy and understanding, Medicine 18 to ensure his comfort, roleplaying showing empathy or understanding of his traumatic experience
Depressed.
Fredrick has started to open up but still retains his belief that the players’ charity is wasted on him and that he is a terrible person; after all, it was his lack of leadership that convinced Murtagh he was a better candidate to be king and allowed him to succeed in the coup. He will also cite historical examples to make his case that he was a lousy king. He also mentions his short-lived marriage to the love of his life, Aoibheann, and how he regrets shirking his royal duties to obsess over finding her after the Drowning of Mountainheart separated them.
Strategies. History checks DC 15 to provide counterarguments to Fredricks’s evidence that he is a lousy king; persuasion checks DC 18 to argue against Fredricks’s perceived view of the world, roleplaying explanations of how bad of a king Murtagh has become, explaining, via roleplay how much he means to the people of the kingdom and the city, or helping him make amends (see the sidequest bury the Hatchet at Sea for an example).
Recovering confidence.
Fredrick has started to see the players as friends. Their words and actions have eased Fredrick through the worst of his depression, but his confidence in himself is shattered. He is unsure if he is fit to be king, doubts his ability as a warrior, and has become his own worst critic regarding his artistic endeavors. If he has recovered enough physically, he will begrudgingly be willing to go on missions with the players.
Strategies. Players can mae a Performance DC 15 check to engage in collaborative poetry and art creation with Fredrick, Athletics DC 12 will let the players engage in some light sparing with Fredrick, Persuasion DC 18 will convince Fredrick of his positive impact on the kingdom, taking him on missions and sidequests will help with his confidence as a warrior, Games of Dragonchess, and 3 dragon ante will help him see his ability as a leader and appreciating his art and poetry will help restore his confidence.
Reward. Once Fredrick’s recovery is completed, he is a somewhat changed man; he is still melancholic and prone to the same pining after Aoibheann as always, but he has resolved to be a better king than he once was. He joins the resistance with all of his special resistance perks.
Mass Disappearances
Recommended Level 5
Faction Mission
Tansy contacts the players at one of their safehouses to help her solve a mystery. The city’s homeless have been disappearing by the dozen from Dunkelwinkel, and it seems the watch and the army are either turning a blind eye or, worse, actively involved in the disappearances.
The investigation
If the players choose to investigate, they can make Persuasion (DC 15), Intimidation (DC 17), or Insight (DC 13) checks to gather clues from Dunkelwinkel. People in the slums are hesitant to come forward, but successful checks will get them to tell the players they saw the missing people being dragged away by the army. A few have seen them being dragged into a factory at the edge of town.
The factory
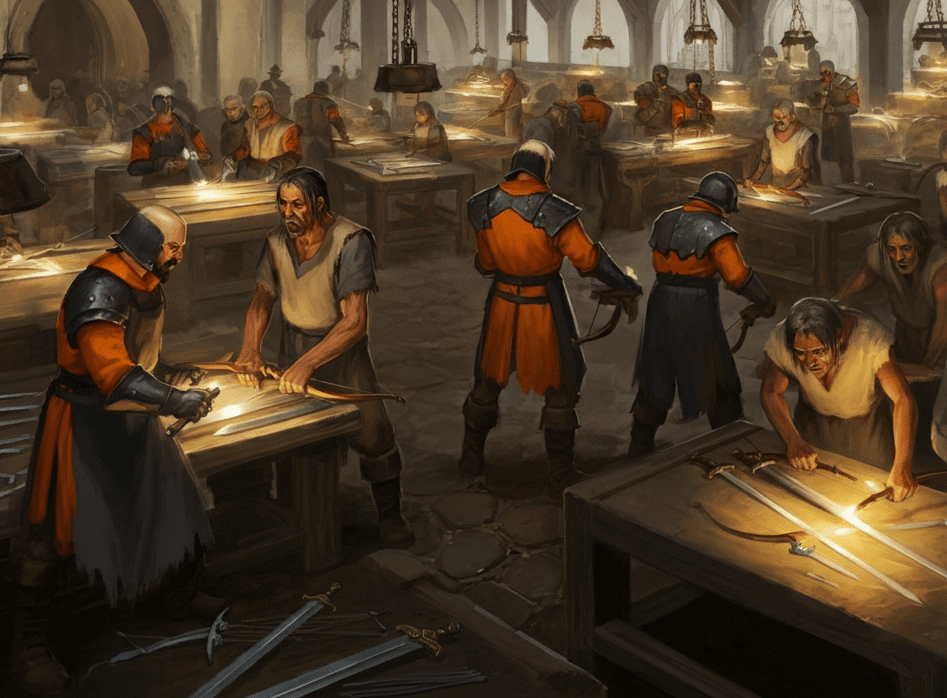
The workhouse, generated with Google Imagen3
The factory is a squat and joyless brick slab of a building that belches oily smoke from a smokestack. Surrounding the factory is a dull iron fence enclosing a trampled mud expanse between other similarly blocky, soulless brick outbuildings. The yard is guarded night and day by 8 infantrymen, 2 veterans, and 6 scouts on the grim rooftops. Inside, they find the homeless people toiling away, making weapons for the army under the watchful eye of a 3 army officer (use the knight stat block) and a force of 10 scouts working as overseers. To free the homeless people, the players must defeat the officers and the skirmishers. If the players successfully free the homeless people, Tansy awards the players with a portable door, and coven opinion of the resistance rises by +10
Matters Of Grave Importance
Recommended Level 2
The players are approached by a teenage goblin with a pale complexion dressed in a black, high-collared coat with a tophat. He introduces himself as Lee Faoghair, the youngest member of the Fagohair clan. His father wants to speak with them urgently about a sensitive mater. Papa Faoghair is waiting for them at the House of Bones.
When the players reach the House of Bones, they find it to be a sprawling series of gothic vaults, chapels, and morgues covered in skeletal decorations, heavy velvet drapes, and ancestral portraits of the Faoghair clan, all of whom bear the same solemn, almost otherworldly expression as Lee. The players are led through the House of Bones by a grim-faced butler to Papa Faoghair’s study, which, like the rest of the House of Bones, has the same Victorian gothic decorations, heavy wooden furniture, dim lighting, and a general air of doom. Papa Faoghair is tall and thin for a goblin and dresses similarly to his son, except the clothing has a bone motif, including skull-shaped buttons and femur-shaped cufflinks. In a deep and resonant voice, he tells the players that dozens of burial vaults have been broken into over the last few days and the bones removed. The sheer scale of the desecration of the catacombs underneath the upper city is disturbing enough for all the clan members, but there is only one reason he can think of for the thieves to take the bones, and the thought terrifies him to his own bones. There must be a gang of necromancers loose in the city. His clan is made up of morticians and priests, not warriors. He asks the players to recover the stolen bones and stop the necromancers.
Tracking the Necromancers. he players can find the necromancer’s lair in several ways. They can use charisma checks DC 15 to canvas the Underberg ward or the surface neighborhoods around entrances to the catacombs near the disturbed graves for witnesses. Alternatively, they can use intimidation DC 12 to achieve the same effect. The players could also use insight checks to determine where necromancers might set up their lair in the city. Finally, the players can make an arcane check to sense the dark magic used in the necromancer’s spells. All three of these methods lead the players to a small house in Slibermond.
The necromancer’s lair. The necromancers are apprentices working for Murtagh’s Royal Mage Corp. There are 2 hedge wizards and 4 skeletons in the lair.
Reward. After the players defeat the necromancers, Papa Faoghair pays them 200gp as a reward. The Fagohair clan also becomes their contact.
Milk Run
Recommended party level 1
Faction Mission
While traveling through the dock ward, the players heard a voice call out to them. The voice comes from a selkie in an almost stereotypical pirate costume in a Keelboat. She introduces himself as Brearbìo and asks if the players want to earn some easy money. She needs a courier to make a delivery for her. The players must deliver a small box to Panthor Silverhoof at Elmwood Hall. There is 40gp in it for them if they complete the delivery; however, the player must not open the box. The artifact within is dangerous, and the box will contain its influence. The box contains a powerful magic item called a MacGuffin. A MacGuffin has the uncanny power to instill a sense of intense desire to possess it in any sentient creature within a 50-foot radius.
As the players enter the theater, they encounter three groups of thieves and lowlifes.
- In the dock ward, they will have to deal with 4 bandits
- In Steinufer, a pair of thugs will try to steal the box
- In the Zollstock, they will have to deal 3 goblin thieves
Every time they overcome an encounter, the players must make a wisdom check to continue resisting the MacGuffin’s lure. The check starts at dc12 and increases by 2 every time they succeed. Only one of the players needs to succeed on the check to prevent the players from opening the box.
At the theater, the players encounter the 4 watchmen that the Royal Army had assigned to Panthor, and they demand that he give them the MacGuffin. The player’s only option is to fight. After defeating the guards, Panthor arrives and thanks the players for their delivery and dealing with them. He pays the players their reward money plus 5gp extra for dealing with his minders.

A MacGuffin, generated with Google Imagen3
The Missing Master
Recommended level 3
The players find a flyer posted around Slibermond asking for help locating Professor Thaddeus Brightspark. He disappeared several days ago when testing his latest invention. The problem is that nobody knows what this invention was or where he was testing it. If the players inquire at the Coláiste Draoidheil, they learn that it is common for the professor to disappear for days while testing his new inventions. If the players search the professor’s workshop with a DC10 investigation check, they find a blueprint for some form of strange suit. A DC 18 intelligence check reveals that it is some form of a diving suit. Alternatively, the players can ask around slibermond if anyone has seen him with a DC 10 charisma check. People do recall seeing him walking towards the harbor with a tarpaulin-covered handcart.
If the players investigate the docks around Slibermond, they find several fishermen who recall seeing a gnome in a strange suit jump off one of the piers and start walking towards the harbor. They also find the cart with the professor’s clothes, and a do not touch if you do not want to be blasted sign. It should be clear that the players should search underwater for the professor. If the players make a DC 16 charisma to ask the local merfolk and selkies if they have seen a strange gnome in a diving suit, they do admit that there was some hubbub in the palace of Duchess Muirín Uisceanna when someone in a weird suit walked in on the duchess getting dressed. The perpetrator has been arrested and placed in a cell for trial.
Upon arrival at the palace of Duchess Muirín, they find that she is more embarrassed by the whole affair than anything else and just wants the horrid little man in the holding cells to go away. The players can convince Lady Muirin to release Professor Thaddeus into their custody with a DC 18 charisma check. The check is made with advantage if the players provide proof that Professor Thaddeus is a university professor. The DC is reduced to 14 if they bring Archchancelor Cwmwllyd to confirm Thaddeus’ identity, Murin was consulting with the Archancellor on accessibility for merfolk at the college.
If the player successfully petitions Lady Muirin to release Professor Thaddeus, he and the arch-chancellor thank you for your help. The players receive a cloak of the manta ray as a reward, and the Coláiste Draoidheil’s opinion of the resistance increases by +2. Also, the players can ask Professor Thaddeus to create one of his Suits of Perpetual Diving for 170 GP.
Missing Pupils
Recommended Level 4
Faction Mission
One of the Silver Moon coven’s sisters, a mouse-like pooka woman with thick glasses named Marla Greenleaf, approaches the players with an urgent quest. She runs the free school in the Burrows neighborhood of Underberg, and her three best pupils had not come to school today, and she is worried sick. She promises the players she can reward them with 20gp and 4 potions of healing she keeps at the school.
Molly. If the players ask around the Burrows using a DC 10 persuasion check, the players learn that Molly left yesterday to visit her daddy, and her daddy was arrested the day before that on a drunk and disorderly charge while out in the Grand Fey Marketplace. It turns out that Molly has snuck into the Grand Fey Marketplace watch station to visit her daddy and got herself thrown into the holding cells. The players will have to break into the watchhouse to free her. (See Chapter 7 for the layout of the city watchhouses)
Jenny. Sweet Jenny was kidnapped off the streets of the Burrow by a slave trader. If the players ask around the Burrows using a DC 10 persuasion check, the players learn that Jenny was last seen playing hopscotch in one of the tunnels before being drawn into a side tunnel by a shady figure. Searching the side tunnel reveals a pair of child-sized shoes kicked to the opposite corner of the alley. They hear a voice from a pile of junk and trash telling them to come closer. The pile suddenly sprouts a goblin head covered with disheveled gray hair. The goblin is Crazy Rags, an eccentric but harmless beggar who lives in the alley. He saw what happened and offers to tell players what he saw if they gave him one of the following things.
- A brand-new blanket
- A silver chain
- Any form of pastry with nuts in it but no berries
- A clean pair of socks
Crazy Rags describes the man who took Jenny as a slimy-looking hobgoblin with ragged clothes, one red eye, his other eye gone and covered with an eye patch, and half his right ear missing. He tells him the man lured the girl over to the alley and had two big thugs grab her and put her in a potato sack. The slimy man told them to take her back to the hideout; the riverboat would be coming tomorrow to take her and the other way. He also thinks he heard one of the thugs say that the warehouse is in Schwarzrauchgasse. Once the players get to Schwarzrauchgasse, they can ask around with a DC 8 persuasion check to learn that the abductor has been seen around a warehouse by the river docks. When they arrive at the warehouse where the slaver was spotted, they find the hobgoblin veteran and four thugs dragging a line of prisoners in neck irons and chains toward the docks. Jenny is among them.
Billy. If the players ask around the Burrows using a DC 11 persuasion or deception check, they eventually find other boys from the free school. They make light of daring Billy to sneak into the Stacked Deck and steal a poker chip. If the players ask around at the stacked deck using a DC 12 persuasion or deception check, they learn that the floor men ran a kid out of the house the other night, and he ran off into Warrens. However, the player’s actions also piqued the interest of the floor men/bouncers working the casino hall, and a few of them discreetly followed the players out. To find Billy, the players must make an investigation or survival check to track Billy’s movement through the maze of tunnels and seedy establishments. When they eventually find Billy, he is crying in a back alley. If the players explain that Miss Greenleaf asked them to find him, he stops crying and follows the players. However, the syndicate goons follow the players and wait at the entrance to the alley. The group consists of 2 spies and 6 thugs.
The Mole
Recommended level 4
Faction Mission
Corporal Knobs approaches the players in a pub in the lower ward and discretely offers them a job. There is a traitor in the ranks of the Old Watch. This traitor has been leaking information about Old Watch’s attempts to shield innocent people from Murtagh’s hunts for traitors, and as a result, several watchmen have been sent to the gulags. The only one the others are sure is not the mole is him because they believe he is a screwup, hence why he is delivering the quest. The faction needs the players’ help to flush the rat out. They have narrowed down to a few possibilities the players need to check. The watchman gives the players a duty roster with 3 names circled in red.
Constable Sargus: Constable Sargus is a fat human with an appetite for figgie hobbins (a type of raisin-filled pastry), coffee, and alcohol. It takes a DC 10 stealth check to follow Constable Sargus around. Spending a few hours following him reveals that while he is not the mole, he is a slob and a poor watchman. He spends most of his time eating pastries and drinking from a flask and seldom, if ever, actually responding to crimes.
Constable Tyler: Constable Tyler is a hobgoblin wound tighter than a watch spring. The whole mole business has got him on edge. It takes a DC 18 stealth check to follow him. If the party succeeds, Tyler leads the player on a dull, uneventful shift that ends when he goes home at sundown. Constable Tyler will break into a run if the party fails the check. He leads the party on a chase through the Great Fey Marketplace until he either gets away or the players catch him. When the players catch him, he turns into a blubbering mess, chattering on and on about please not killing him, which makes it clear that he is not the mole.
Constable Downey: Constable Downey is the mole. This centaur officer has betrayed her comrades to get her husband out of jail. However, the success of her betrayal has resulted in her becoming complacent. The players can follow her using a DC14 stealth check, and she will lead the players straight to the dead drop she uses to contact her handler. She will leave an incriminating note that details several fellow old watch officers refusing to toe the new regime’s line. If the players bring the evidence to one of the Old Watch watchmen, they meet with disbelief and resignation. They give the players a written promise to get the players out of jail if they are ever caught, and the Old Watch’s opinion of the players rises by +5
Moneyboat
Recommended level 3
repeatable.
Requires resistance reinforcements.
The players learn via faction contacts (likely the New Mountainheart Merchants Guild, The Rats, the Old Watch, or the Syndicate) that the Royal Army regularly sends large shipments of money up the
Silverfluss to be distributed as pay to the various armies in the field. The shipments move on heavily guarded river barges. Worse, the barge passes through the river bastions, a large, fortified, and heavily manned checkpoint that spans the river at the city’s edge. The players must devise a plan to defeat the barge’s guard before reaching the checkpoint and its ballistas.
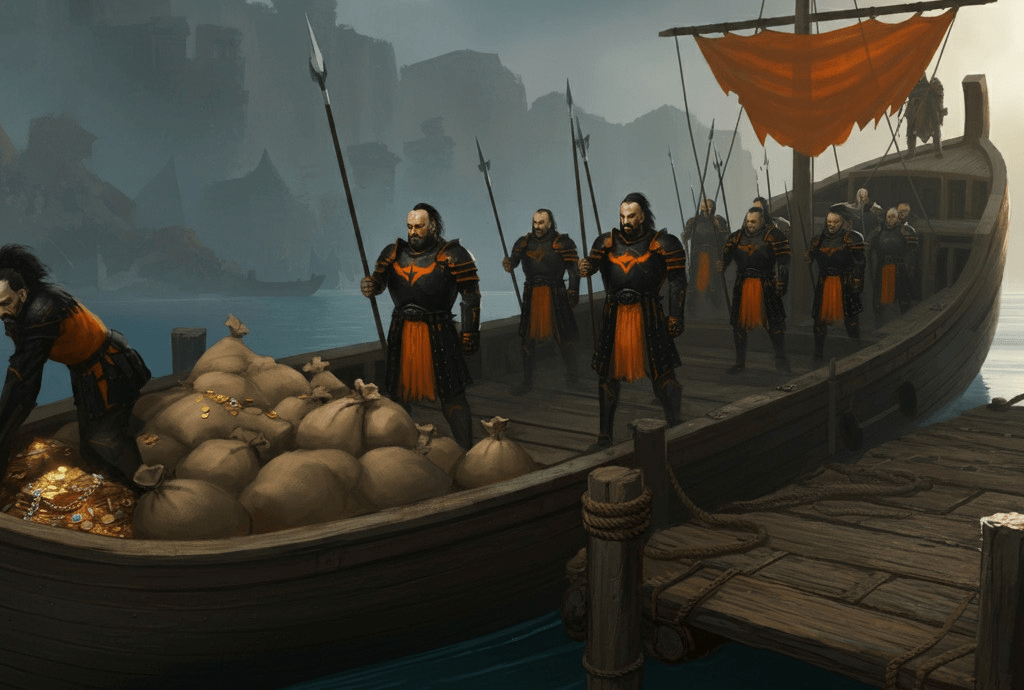
The barge, generated with Google Imagen3
The Tannery Row Moorings
Usually, the barge moorings along Tannery Row would not interest the Royal Army. Usually, there would hardly be a soldier around this stinking set of short, rundown wooden docks stretching over the river’s polluted side. However, with this much money, the army is not taking any chances. There are 7 infantrymen led by a knight on the docks, watching as six laborers load the chests into the barge. 7 skirmishers are lounging about the barge, waiting to shove off. Once the battle is joined, the crew and escort of the barge will try to load the remaining chests as fast as possible. Start a timer d6. The barge will shove off into the river when the timer reaches zero.
On the river
If the barge departs before the players deal with the guards, it is not the quest’s end. The barge is a tow barge towed by draft horses, and the horses are traveling at a walking pace. If the barge departs before the players can board, start a timer d10. When the timer reaches zero, the barge will reach the river bastion and the overwhelming force of soldiers stationed there. The players can either stop the horses or cut the rope between the horse and the barge while dealing with the escort. To reach the barge, the players must make a DC 15 acrobatics check to leap from the tow road to the barge, and a DC 14 athletics check to swim fast enough to reach the barge. To reach the horses, the players must make a DC 13 athletics check to run fast enough to catch up to them. They must deal with the escort once they reach the horses or the barge. The barge is escorted by the skirmishers not killed in the previous encounter, and the teamster and his draft horses are escorted by a pair of centaur cavalrymen.
Treasure: 2500gp in various coins
Development: Every time the players successfully rob a barge, the regime increases the size of the escort. Two skirmishers are added to the barge, 2 more infantrymen are assigned to the loading detail, and an additional centaur cavalrymen is added to the teamster’s escort. After the third successful robbery, an additional barge is added with 20 scouts on board
Not Funny
Recommended Level 3
Faction Mission
One of the New Mountainheart Merchants Guildmembers, a halfling with an almost comically oversized mustache named Garwan Marbleberry, approaches the players while they are traveling through the Grand Fey Marketplace or Alteburg and asks for help dealing with some droll squatters. The drolls had run every other merc he had hired out of the building with several more colors and scars than when they went in, and the watch is too busy with the resistance to help. The building in question is an old pub covered with colorful droll graffiti in a block of magic item shops that have been shut down by the watch and vandalized by the drolls and other punks in the city. Currently, the only occupants of the pub are a droll trickster and 4 droll anarchists who are redecorating the taproom for the twentieth time with new graffiti. The sound of the fight draws other drolls into the fight. Start a timer at the beginning of the battle; when the timer reaches zero, 1d4 Fairies enter the fight. After clearing the inn of drolls, the guild member will award the players 200gp, and the guild opinion of the resistance increases by +3, and the droll opinion of the resistance decreases by -4.
Paint the town red
Recommended level 2
Faction mission
Drollish Graffiti, Generated with Google imagen3
The players receive a message from The Grand Absurdist written in flowing calligraphy on fancy stationery. She commands the players to deface one of the city’s public buildings, such as the castle or the The Cathedral of the Radiant Sun, with drollish graffiti. To paint the graffiti right, one or more players must render themselves drollish.
To become drollish, the players must drink a sour-tasting potion provided by the drolls. Drollish players have short attention spans and gain the following flaw: “I have an overwhelming urge to steal random stuff, vandalize buildings, and beat on plonker.” Drollish players prefer melee combat over anything else and will attack the nearest enemy until they are dead. The players should be encouraged to act impulsively and embrace the chaotic absurd.
To complete the mission, one or more players affected by drollish must spend 6 consecutive actions painting a wall of the structure using the magic paint sprayers provided by the drolls. These structures are guarded, so players must deal with a combat encounter while the drollish players paint.
When the task is completed, the grand absurdist rewards the players with 60gp of broken bottles, bricks, and random bits of building ornamentation. Drolls’ opinion of the resistance rises by +4; however, if the players vandalize a building belonging to another faction, their opinion of the resistance falls by -4.
The path to salvation
Recommended level 5
Faction Mission
Abbot Thalmarin Voss contacts the players via a courier with an urgent request. The abbey has been sheltering the families of the knights who were imprisoned for not supporting the coup. Murtagh seems to suspect the abbey to be why he cannot find these people. Thalmarin wants the players to escort the families out of the city. The plan is to send the family up the river on a riverboat owned by a sympathetic businessman to one of their sister monasteries. The problem is that there is a checkpoint where all boats are inspected at the river bastions. The players must clear out the river bastion before the boat can safely leave town.
Successfully clearing out the bastions gets the players a reward of 400gp from the abbot and the families they saved. Silver Moon Covens’s opinion of the players increases by +4, and the sanctuary’s opinion increases by +4.
Pilfered Charity
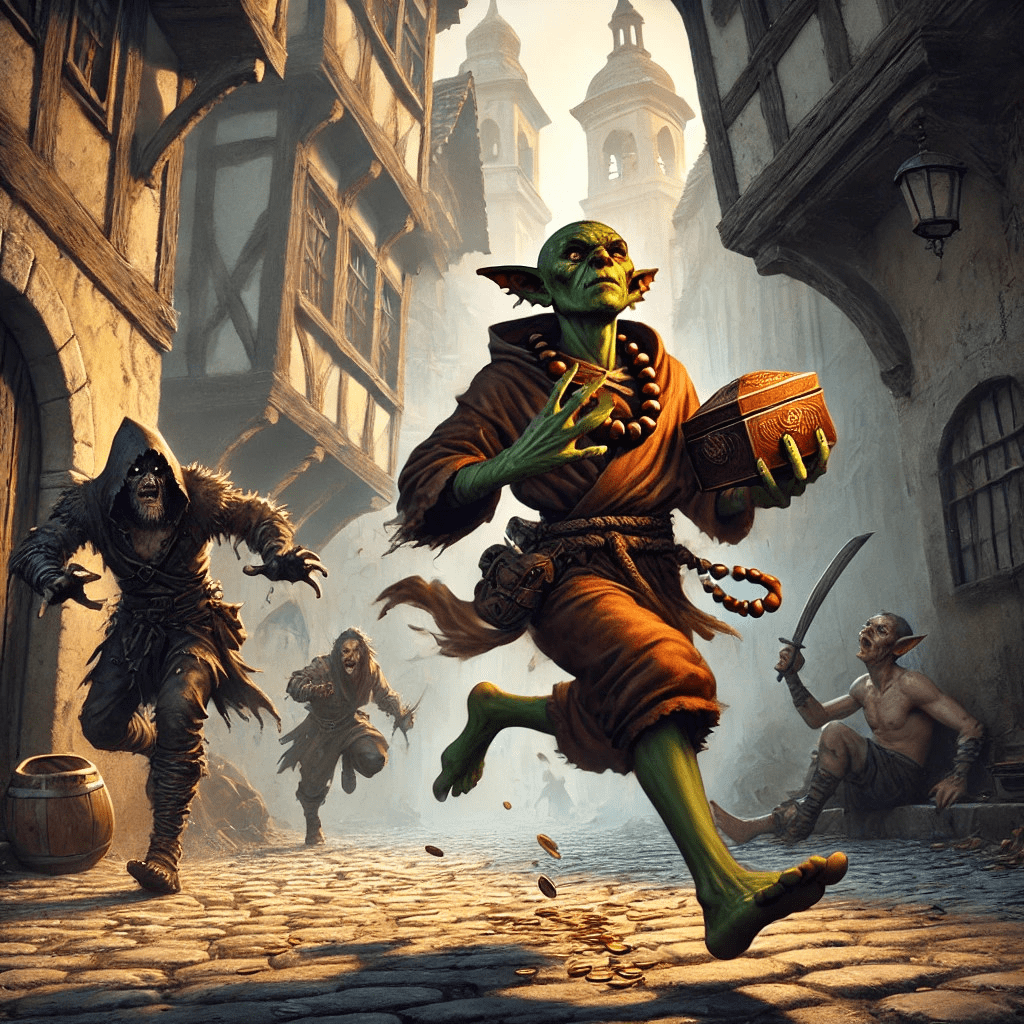
Being a brother of the Sanctuary of the Resplendent Hand is usually a dull profession, generated with OpenAI DALL-E 3
Recommended Level: 1
Faction Mission
The players find a goblin in a monk’s habit lying on the ground in front of an alley in the Grand Fey Marketplace. The monk starts to rouse himself as the players check to see if he is okay. He introduces himself as Brother Odhrán O’Lee of the Sanctuary of the Resplendent Hand. He was out with a cart collecting alms when a trio of footpads attacked him, knocked him unconscious, and stole the cart with the alms box. Brother Odhrán begs the players to find the miscreants who beat him and stole his cart. The attack happened not too long ago, so the thieves are likely still in the neighborhood.
The players must track the thieves through the marketplace. By making a DC 15 investigation check, they notice a trail of muddy footprints leading down one of the alleys in the neighborhood. If they make a DC 10 Charisma check to canvas the area for witnesses, they learn that a trio of hoodlums pushed a cart with a strong box down a nearby alley.
When the players arrive in the alley, they find 3 thugs trying to open the alms box with a chisel and sledgehammer. Upon dealing with the thugs and returning the cart to Brother Odhrán, the players receive +2 opinion for the sanctuary of the Respendent hand, and the next day, Brother Odhrán tracks down the players and gives them 3 healing potions as a reward.
The Plague
Recommended Level 3
Faction Mission
There is a plague going around Schwarzrauchgasse. Abbot Thalmarin Voss contacts the players about providing men to protect his monks and nuns from harassment by the army, drolls, and other criminals who have moved into the neighborhood since the coup. He promises a reward and increased support for the resistance if the players complete the mission.
The mission starts at the abbey. The players must escort an ambulance wagon with 5 doctors (acolytes) through the Schwarzrauchgasse slums. The doctors have 3 stops to make. At each stop, roll for random encounters on the following table.
| D8 | encounter |
| 1 | A droll trickster and 4 droll anarchists |
| 2 | A droll trickster and 6 Fairies |
| 3 | 10 infantrymen |
| 4 | 6 infantrymen and 4 skirmishers |
| 5 | 5 highwaymen (5 thugs and 6 riding horses) |
| 6 | bandit captain and 4 thugs |
If the players successfully protect the doctors, Thalmarin Voss will reward them with 100gp in various medical supplies and spare foodstuffs. Silver Moon Covens’s opinion of the players increases by +4, and the sanctuary’s opinion increases by +4.
Rat Hunt
Recommended Level 4
The Usurper is paying top dollar for the Rat King to be brought in Dead or Alive. The bounty posters for the Rats leader are posted everywhere.
The Rat King can be found in the Listing Brig, a rundown tavern and boarding house located in an unsavory corner of the dock ward that is the preferred hangout of much of the oceangoing scum in the city. When the players arrive the dimly lit taproom is packed with rat members when they arrive. There are 2d20 bandits, 1d12 thugs, and 1d8 spies in the tap room downstairs, itching for a fight. When the players enter the Rat King’s room, he immediately blows a conch shell to signal that she is in danger and throws herself into the fight. When he blows the conch, start a timer d4. When the timer reaches zero, the mob in the tap room comes charging through the halls to their leader’s rescue. The nature of the hallway means that the rats can only come 2 at a time, but the sheer number of them makes it a difficult encounter to overcome.
Bringing in the Rat King earns the players a 200gp bounty, +3 SBHU, and -10 Rats opinion.
The Ringleader
Recommended Level 5
Faction Mission
Among the bounties issued by the SBHU, one has been bedeviling the union for a while. A mastermind has been operating in the shadows of the city, using hypnosis and brainwashing to make random people commit crimes against regime collaborators among the peerage for him. There is no description of the mastermind or any clue to his identity, just a single cryptic clue. When left alone, the victims refer to the mastermind as the ringmaster and hum calliope music.
All the victim-perpetrators of the mastermind are being treated at the Sanctuary of the Resplendent Hand, and the players can try to interrogate them at the hospital. However, the victims’ conscious minds do not remember anything about the ringmaster. However, that does not mean their unconscious mind does not remember. One of the doctor monks at the hospital suggests that the players try hypnotizing the victims to get the answers they are looking for, and he is willing to perform the hypnosis. When under hypnosis, the victims remember sensory details about the ringmaster that suggest a carnival or circus. If the players cast Detect Thoughts on the hypnotized victims, they see an image of a landscape in Fairy Court where a traveling circus is set up.
Upon investigating the circus, the players find a joyless complex of faded tents and a few dozen carnies camping out and stewing in or drowning their misery. They have been camped out for a month with barely any customers, and the watch has ordered them to stay put on pain of death. The carnies are worried about buying food in the coming days. When asked if there is an enchanter or hypnotist among the carnies, they are pointed to the wagon belonging to Albert the Enchanting, the carnival resident mage. The carnies mention that Albert has been the reason they have not starved yet; he has been providing them with cash to pay for food from a secret stash in his wagon. When they find the wagon, they find Albert in the process of brainwashing his next victim with the help of 3 brainwashed thugs. He will not go down without a fight and during the fight he will rant about the absurdity Murtagh’s regime and the dark comedy of its ruler’s rules.
Bringing in Alberg will earn the players 240 gp in bounty money and increase the SBHU’s Opinion of the resistance by +4.
The Ripper
Recommended level 3

The ripper, generated with Google Imagen3
Faction Mission
A centaur patrolwoman tells the players in a hushed voice to meet her at the Iron Oak Inn at 8 pm. If the players do what the women suggest, they find her drinking in a booth under the inn’s stairs. She introduces herself as Annie Hynes, a member of the Old Watch. She contacted them because there is a crisis in the lower city. There is a serial killer loose in the lower ward. The killer is vicious, ripping people apart and apparently eating them. The killer has an uncanny ability to avoid the watch. With so many of the watch’s resources dedicated to hunting the players and the resistance, there are few men to spare to hunt the killer and the Old Watch certainly does not have the manpower to perform a drag net of the lower ward. The watchman promises the Old Watch will make the player’s efforts worth it if they can capture the ripper.
The players must go from neighborhood to neighborhood in the lower ward and make a DC 12 Survival check in each to track the ripper. The ripper, it turns out, is a man cursed to be beast who only attacks people due to instinct and hunger. The beast uses the stats of a werewolf with the following changes
- He does not have access to the change-shape ability
- He attacks do not curse the players with lycanthropy
- The spell remove curse returns the beast to human form
Upon successfully dealing with the ripper, the players find a key in one of the Old Watch’s dead drops. The key opens a small shed in the lower ward filled with weapons and armor that the Old Watch borrowed from the confiscated property warehouse. The gear will allow the players to equipt 5 resistance soldiers
at half price. Also, the Old Watch’s opinion of the players increases by 2.
The rogue bounty hunter
Recommended level 3
Faction Mission
Among the bounties issued by the union is one not one of the bounty hunters dare take. The bounty head is a former union member who has gone rogue. Seraphina Windstrike is an elf bounty hunter who is a crackerjack shot. She also has gone off the deep end after her husband was killed in the coup. She is now waging a one woman against the Usurper, sniping members of the army and supposed regime collaborators. None of the hunters dare take the job out of respect for a former member and fear she has gone completely insane. Worse, the bounty issuer, Cassidy Rose, insists that the Seraphina be taken alive or there is no pay.
The players must scour the city’s many wards to find her. The dm will choose a random ward as Seraphina’s current hunting ground. The players can make DC 15 survival, investigation, perception, or persuasion checks to check if she is in a ward. Once the players successfully track down Seraphina Windstrike by, making a successful check in the ward, they spot her as she is making a shot at an army captain. Seraphina Windstrike immediately flees and leads the players on a chase through the city toward the Market Grove Bazaar.
Once the players reach the Market Grove Bazaar, it is confirmed that Sera is indeed insane, ranting at no one about her dead husband. She stays on the treetops and second floor of the marketplace while she attacks. If the players successfully bring her in alive, Cassidy Rose will reward them with 200gp, and their SBHU opinion of her will increase by +5. If the players fail to bring her in alive, they do not receive the reward, but their SBHU opinion of them rises by +2.
The Rouge Student
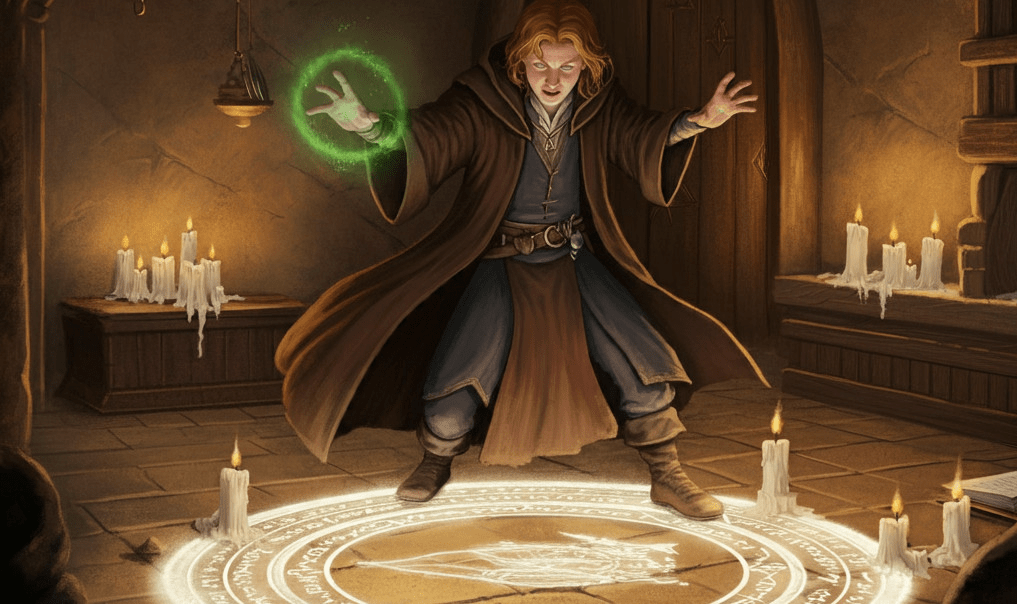
Demon summoning in progress, generated with Imagen3
Recommended Level 5
Faction Mission
Some time ago, postgraduate student Thaddeus Blackthorn was expelled from Coláiste Draoidheil because he developed an unhealthy obsession with demonology. When the coup occurred, he promptly joined Ulrich’s mage corps and, with his new master’s blessing, continued his research. He is getting close to a breakthrough in demon summoning. Archchancelor Cwmwllyd has become aware of the pending ritual through various forms of magical detection and monitoring equipment setup throughout the campus grounds. He contacts the players via message with a job offer to stop Thaddeus.
The players must search Schwarzrauchgasse for Thaddeus’s laboratory. The players can make arcane checks DC 10 to sense magic fluctuations, charisma checks DC 12 to question locals, or investigation checks DC 15 to find the condemed and half collapsed house in the Steinufer where the lab is located. Inside, they find Thaddeus, a Mage, preparing to summon a demon. He seems deaf to reasoned argument and hellbent on completing the summoning. When the battle starts, start a timer d4: when the timer reaches zero, a 1d6 hostile dretches are summoned into the magic circle in the middle of the room. Restart timer. When the timer reaches zero again, 1d6 dretches appear in the circle.
The timer can be stopped by making a DC 15 arcana check to disrupt the magic circle, and Thaddeus can take action to start a new timer. Completing 3 checks in a row completely disables the magic circle and prevents any more demons from being summoned.
If the players successfully deal with Thaddeus Archchancelor Cwmwllyd will give the players his old Witchbane Sword , and the Coláiste Draoidheil’s opinion of the players increases by +2
A Romance Writer’s Revenge
Recommended level 4
The notorious high elf hack romance writer and heartbreaker Lady Aisling Bellefontaine contacts the players via a friend of a friend and invites them to her Alteburg townhouse to offer them a job over tea and biscuits. If the players choose to take Aisling up on her offer, they find the author is visibly upset and barely able to contain a potent mixture of anger, humiliation, and wounded pride throughout the conversation. Her love life has just taken a disastrous turn. Count Ulrich von Schattenbrand recently and publicly ended their passionate love affair. Her former beau considered their relationship to be merely a fling. With her dreams of being a countess dashed, she wants Ulrich to feel the same way she does. She wants the players to break into his spire mansion and rob his beloved personal art gallery. She wants them to steal Ulrich’s favorite piece, a rare marble bust of High King Faolan the Mad. She will pay the players 200gp for the job, offers to write a letter of recommendation to her friend in the gentry for the players, and suggests that she might be willing to offer the players a favor if they bring her some juicy tidbits to use in her novels. They can keep anything else they find in the palace.
Sewer Spelunking
Recommended Level 4
The city’s chief engineer, Thimblecrook Cogspinner, has been posting flyers for a job in the sewers all over town, and nobody seems willing to accept. However, the players could use the help of the little gnome engineer; he has blueprints for every building in the city.
If the players contact Thimblecrook, he explains that something is blocking the main sewage channel from the top of the Sliber berg to the underground sewer processing plant in Underberg and that something attacked some of the workmen he sent to clear the blockage. He can only pay the players 200gp for completing the job, but he promises he can help the resistance in other ways.
Into the sewers
Sewer Spelunking, generated with Google Imagen3
If the players accept the job, Thimblecrook gives them a map of the sewers, a key to the manhole outside city hall, and a Demolitionist’s Mark just in case. Upon entering the sewers, they find a twisting maze of stinking passages and channels filled with deep sewage. The players will find traveling through the sewers difficult, even with the map. One of the players will have to do a DC 18 intelligence check to find their way to the clogged channel. On failure, they wander around a bit and encounter the following monsters.
| D4 | encounter |
| 1 | 2 wererats |
| 2 | 8 swarms of rats and a wererat |
| 3 | 2 carrion crawlers |
| 4 | 1 black pudding |
Opening the Drain
When the players reach the clogged channel, they find a very fat Otyugh lodged at the entrance to the channel. The Otyugh is happy as a pig in mud and telepathically making his pleasure known. The Otyugh will not leave the pipe willingly and will fight the players if they try to coax it out of the pipe. Once the Otyugh is defeated, the players must devise a way to dislodge it from the pipe. It takes two simultaneous DC 19 strength checks, hacking the creature to bits with bladed weapons or blowing up the corpse with the Demolitionist’s Mark to remove the blockage. Once the players return to Thimblecrook, he happily gives them the promised money and promises that if they ever need Demolitionist’s Marks or blueprints for any building in the city, he will be happy to provide them.
Speak no Evil

Loose Lips can be deadly in the wrong circumstances, as generated by Google Imagen3.
Recommended level 1
Faction Mission
Elric Oakensong, a bard postgraduate student, has a problem. A jilted lover has paid a hag to lay a curse on him while he was out gallivanting with friends. He now compulsively and constantly comments about everything and everyone; worse, what he says is the absolute blunt truth about how he feels about them. He was unfortunate enough to comment on the Murtagh regime within earshot of some soldiers, and now he is forced to run for his life through the city.
The players find him somewhere in the lower ward, skulking through the city from hiding to hiding spot. He asks if they can escort them back to the campus or the Sanctuary of the Resplendent Hand, whichever is closer. He knows that one of those two locations will have a cleric who uncurses him. The problem is that he cannot stop talking, meaning stealth checks are made with a -4 penalty and a disadvantage while with the party. Worse, both locations are being guarded by tough groups of enemies.
Escorting Elric to safety gains the players +1 to Coláiste Draoidheil opinion and 10gp as a reward.
Steal Ulrich’s chamberpot
Recommended level 3
Faction Mission
The players receive a message from The Grand Absurdist written in flowing calligraphy on fancy stationery. She commands the players to break into the spire of Ulrich, the battlemage, and steal the mage’s personal chamberpot. This is impossible because the spire has plumbing and does not use chamberpots. Worse, the players cannot bring the Grand Absurdist any old chamber pot because she will send a droll to watch the entrance to see if they come out with a chamber pot that is sufficiently fancy for the fancy pants battlemage to own. The players will have to sneak into the spire while carrying a fancy chamberpot and sneak out a sufficient amount of time later with the pot.
Completing the quest earns the players 40gp in spoons, table legs, and various other household clutter and an +5 increase in droll opinion.
Stolen Succor
Recommended Level 4
Faction Mission
Abbot Thalmarin Voss contacts the players with a crucial mission via a novice of the order. The army has gone too far and stolen much of the abbey’s supply of medicine and sterile bandages. The supplies were taken to the Carrey batteries to be delivered to the troops at the front line. The players must infiltrate the fort and retrieve the stolen supplies from a wagon in the fort’s bailey.
When the players complete the mission, Thalmarin will reward the players with 300gp.
The Substitute
Recommended level 3
Faction Mission
The don has a problem. A boxing title match at the Stacked Deck is set to start later today, but the challenger, Jack the Rock O’Reliey, was arrested earlier today on an assault charge. It is a big match against the current heavyweight title holder, Mick “Iron Fist” McGrath. Don O’Malley needs a new fighter, pronto. He is holding auditions in a backroom box ring in the stacked deck open to all comers and has covered Underberg with flyers.
Tryouts
The audition consists of a boxing match against one of the Syndicate’s thugs, a barrel-chested human man with a smashed-up face. To participate in the audition, the players must choose a representative to join the ring. The audition match is bare-knuckle using the London Prize Ring Rules with no rounds. When boxing, the players use the following mechaincs.
- Weapons and magic are not allowed
- Players can make Unarmed strikes (1d4 + Strength modifier).
- Players can Grapple (Athletics vs. Acrobatics/Athletics).
Defeating the thug earns the player the right to fight in the title match. Getting selected in the audition increases the Syndicate’s opinion of the players by +1.
Title bout
The title bout occurs later that same day. The fight occurs in the arena located in the Stacked Deck before a rowdy live audience. Mick uses the stats of a bandit captain. The rules of the battle are the same as the audition match, with the following additions:
- The match occurs in 1 minute (10 turns) rounds
- Between each round, there is a 30-second break
- During the break, the players can use a healer kit to grant the player in the ring 1d4 temporary hit points.
- The match continues until one opponent reaches zero hp.
Unbeknownst to the players and the Syndicate, Mick is a dirty cheater. Before each round, a cleric friend casts bless on him. Players can detect the spell being cast with a DC 15 religion or arcana check. If the player in the ring can beat Mick or the players call him out as a cheater, they win 100gp in prize money and +2 opinion with the Syndicate.
Sunk Costs
Recommended level 3
Faction Mission
While traveling through the docks, the players are approached by a teilfling in a captain uniform with golden teeth. She introduces herself as Ironbeard Quinn, a Rats smuggling crew captain. She has a potential salvaging job for the players. Earlier that day, after a prolonged chase with the Royal Navy, one of the gang’s keelboats had sunk in the harbor. Fortunately, the cargo, about 5 dozen bottles of expensive wine, was stored aboard in 3 watertight crates in a secret compartment in the hull. Unfortunately, the cargo is now in Duchess Muirín Uisceanna’s domain. She tends to claim any shipwreck that enters her domain and does not take kindly to salvagers. The ship sank only an hour ago, so there is a chance that the players can get to the wreck before Lady Uisceann’s merfolk can. If the players can retrieve the cargo, the Rats will cut them in on some of the profits.
Once the players arrive at the wreck site, Captain Quinn will use his ship’s crane to drop an anchor, a<> diving bell, and a cargo net and tell the players to put the crates in the cargo nets. The diving bell, which looks like a small handbell, will produce a continuous air bubble 5 feet wide for about 1 hour.
When the players dive into the harbor, they must do a DC 17 perception check to spot the keelboat in the murky water in the harbor.
When they find the sunken keelboat the players discover that the secret smuggling compartment is intact, and the seals on the crates are still good. It takes a DC 12 athletics check to maneuver the heavy crates into the cargo net. While maneuvering the second crate, the players encounter a merfolk salvaging party consisting of 4 merfolk salvagers and 3 giant octopi . The group immediately attacks the playes.
When the players finish the salvaging work, Captain Ironbeard Quinn will reward them with a pat on the back and an advance of 80 gp on their share of the profits. A few days later, he shows up at the Listing brig to give the players the rest of their share, 100 gp. The rats’ opinion of the players increases by 4.
The Taskmaster
Recommended level 2.
Faction Mission
The players hear word in a dockside tavern about a potential job being offered by the Rats. One of the navy officers that the rats especially loathe is Captain Darius “The Snake” Blackwater. He was one of them until he joined the Navy and was made a captain. He is now firmly one of Kraggath’s flunkies and uses his privileged position to bully his former friends. Word is that the Rat King would pay handsomely if someone were to assassinate the bastard.
Captain Darius’ ship, a cog with a hull made from mismatched pieces and a sail made mainly from patches named the Bastard Reward, is moored 50 yards from the nearest dock, requiring the players to swim to the boat or acquire a rowboat. The captain has a crew of 7 bandits who will attack the players on sight. When the battle begins, start a timer d4: Captain Darius will join the battle when the timer reaches zero. He uses the stat block of a bandit captain.
Defeating Captain Darius will result in the players receiving 150gp in gemstones from the Rat King, and the Rats’ opinion of the resistance increases by +2.
Time enough for tea
Recommended level 2
Something strange is happening in Slibermond. One of the city’s most powerful wizards, Master Thistledown, has not been seen in weeks. The little gnome is a master of chronomancy and a master clock and watchmaker. His shop on Silvermoon Way is closed, and strange noises and lights are coming from the second floor. A consortium of Slibermond residents worried about the venerable archmage and his adoptive fairy daughter, Sugarplum, contacts the players.
Shop Time
When the players arrive at the Master Thisledown shop, they find it dark and locked up tight, and strange lights coming through the second-floor windows.
Locked Door. The Branagor Security Solutions lock requires a DC18 dex check with thieves’ tools to unlock it
Clock Shop. The shop is filled with watches and clocks of all descriptions, all stopped at the same exact time. The players hear strange sounds coming from the upper floors of his shop; they sound like distorted voices.
Time out
At the top of the stairs is a wall of crackling white fog. If they walk through the mist, they find themselves in a clockmaker’s workshop filled with tools and workbenches. They also find Master Thistledown frozen in time at his workbench and a 5-year-old barefoot fairy girl with cherubic features in a pink sundress crying in a corner. The moment the girl sees the players, she dives under the workbench and starts to whimper in terror. It will take clever roleplay, a DC 15 Charisma check, or sharing sweets with the girl to calm her down.
Sugarplum’s Tale: Once she calms down, Sugarplum starts to explain what happened; her father has been so busy lately that he barely has time for himself. She wanted to create more time so that her father could take tea time with her, so she messed with one of his inventions, hoping it would make more time. Instead, it froze her papa in time and trapped her in a temporal bubble that spanned the upper two stories of the shop. She was so frightened by what happened she accidentally knocked the device onto the floor and broke it while she was trying to start time again. She has no clue how long she has been trapped in here.
Starting the clock again
To unfreeze Master Thistledown and dispel the time bubble, the players must fix the device that Sugarplum broke. To repair the device, they need to make a DC 16 arcana or investigation check to understand the device’s blueprints and figure out what is wrong with the device, A dc 12 perception check to find the parts, and a DC 14 dex check with tinker or thieves tools to reassemble the device. When the device is turned on, there is a burst of magic through the room, which causes 12 of the tools around the shop ls to come alive and attack the players. The tools use the stat block of flying swords. Once the swords are defeated, the time bubble disappears, and time resumes. Master Thistledown is confused by the players’ sudden appearance in his workshop, and Sugarplum tearfully hugs her father. Master Thistledown gives the players 80 gp for saving him. Master Thistledown also becomes a contact. He can provide the players with reset bombs for a small fee of 150gp.
Uprising of the Animals

The livestock revolution is about to begin, generated using Google Imagen3.
Recommended level 3
Improviszation heavy
The players learn, either from rumors or Branwen the collie, that some of the city’s awakened animals are planning their own uprising against the regime. They meet at O’Sullivan’s stockyard in Tannery Row at night to plan their uprising.
If the players investigate the stockyard, they find a rally in process. A white bull by the name of Ball-Sneachda is addressing the assembled creatures. Ball-Sneachda comes off like Che Guevara and preaches a similar sort of Marxist utopianism. However, it becomes clear by talking to the animals that the supposed revolution does not have much of a plan. They believe that they can successfully storm the Carrey Batteries, rally their brethren among the warhorses of the garrison and then march on the castle and reinstate Fredrick as King, he might have been a piss-poor monarch, but at least he did not ask too much of them. They have no idea what the fort’s defenses are beyond the front gate or any reasonable guess as to how many soldiers are inside.
The players can attempt to roleplay or use checks (suggested DC 13-18) to convince the animals to join the resistance instead of mounting a suicidal attack against the Carrey Batteries. If the players can recommend a better strategy for the animals to undertake, they make the check with advantage. However, if the players make too many gaffs or fail too many checks, the animals will start to get restless as Ball-Sneachda calls them hypocrites and enemies of the revelation and orders 1d20 bulls and 1d20 draft horses to attack the players. If the players succeed, they gain the animal revolutionaries as contacts.
Urgent Delivery
Recommended Level 1.
Soldiers stopping travelers on the bridge over the Silverfluss, generated using Google Imagen3.
Faction Mission
Tansy, or one of the sisters of the Silver Moon Coven, contacts the players. Tansy needs the players to deliver a crate of supplies to one of the coven’s midwives working in the part of Schwarzrauchgasse, which has yet to be turned into army housing. The players must do the delivery because Count Cathán’s men have been harassing everyone crossing the bridges into Schwarzrauchgasse.
When the players attempt to cross one of the bridges, they find five infantrymen camped standing guard in the middle of the span. They stop the players and demand to know what their business is in the slums. The players must try to talk their way through the guards without revealing that they are the leaders of the resistance. If the infantrymen realize that the players are wanted rebels, they immediately attack the players. Once the players defeat or otherwise get around the infantrymen, the rest of the delivery goes as expected. A sister of the coven accepts the delivered supplies and thanks the players. Once the players return to Tansy, she gives them a reward of 20gp each, and the coven’s opinion of the players increases by 2.
Where’s Wynvelen?
Recommended Level 3
Among the myriad residents of Pixiewood Wynvelen, the feydrake is by far the most beloved. The park resident jester’s pranks, tricks, and games delight every visitor to the park. So, it is a major surprise when the players are approached by a leprechaun with a request from Countess Rósín Dubh to locate the missing dragon.

Wynvelen the fairie dragon enjoying his favorite food, snickerdoodles, generated using Google Imagen3
The Wrecked Burrow
When the players arrive at Wyn’s burrow in Fairy Court, they find it wrecked. Heavy bootprints litter the mud around the burrow, and it looks like it was dug up with shovels. The only things left inside are a collection of pretty but worthless baubles and an empty tin of snickerdoodles. Investigating the burrow with a DC 15 investigation check reveals some torn cloth of the same type used to make trench coats and a pack of matches from the Stacked Deck. A perception check DC 18 reveals a suspicious individual sitting on a nearby park bench with his nose in a broadsheet. The man is a syndicate footsoldier whose job is to see if the countess hired anybody to search for Wyn. The players can also canvas the area for witnesses with a DC 12 charisma check. The witnesses tell players that on the day of his disappearance, Wyn spent the day playing with the O’Malley children; he was in top form and made some impressive and hilarious impressions of their father, Finnegan, as the tough guy mobster. If they get a 15 or above on their skill check, they also learn that the men who dug up the burrow were common street thugs. This evidence should direct the players towards the syndicate as the perpetrators.
Where in Sliberberg is Wyn?
Next, the players must figure out where the don has the dragon. The players will have to interrogate the don’s men to find him. The players can discover the syndicate foot soldiers in bars in Underberg and the grand fey marketplace. The players either convince the thugs with words (DC 15 charisma check) or violence. Roll a d6, showing how many spots the players will have to check before they find what they want to know. The thugs will reveal that the don has the little dragon in his office at the Stacked deck.
If the player successfully saves Wynvelen, Countess Rósín gives the player a purse with 70gp and a rose that, when blown upon, casts the Sanctuary spell on the blower. The rose loses its power after one use.
The Young Radicals
Recommended level 2
Faction Mission
The players are contacted by archchancellor Cwmwllyd to deal with a sensitive matter. A group of first-year students have formed their own resistance movement led by a fiery young Saytr druid named Ciaran. The group are radicals who promote extreme and very public violence as a means to deal with the Usurper and his men. While the archchancelloris sympathetic to the student’s plight, he thinks the student’s action will result in reprisals against the Coláiste Draoidheil. He wishes the players to go to the radicals’ hangout at the Rose and Holly gastropub and talk some sense into these firebrands or at least deal with their leader. When the players arrive, they find Ciaran, wearing an old army jacket and a beret, sitting in a corner with 3 students (commoners). The players must convince the students to stop their violent attacks by either convincing roleplay or the following skill encounter.
- Persuasion (DC 15): Convince Ciaran and the group that their actions will cause more harm than good.
- Intimidation (DC 13): Use forceful language to make the students see the folly of their ways.
- Insight (DC 12): Understanding the students’ personal motivations allows the players to target their arguments more effectively.
- Performance (DC 12): If the players include a bard or a character with a performance background, they could challenge Ciaran to a contest of skill, using music or rhetoric to sway the group.
Outcome Based on Successes/Failures:
- 3 or More Successes: The players successfully convince the students to abandon their extreme methods
- Less Than 3 and More Than 1 Success: Ciaran is unconvinced, but his fellow resistance members’ faith in the righteousness of their cause has been shaken. He will attack the players to reassert his dominance.
- One Success: Ciaran and his radicals are unconvinced and actively offended by the players seeming hypocrisy. They rise from their booth and attack the players. Defeating Ciaran will cause the students to back down.
If the players deal with the Ciaran and convince the students to back down, Archchancellor Cwmwllyd will grant the players their choice of either 90gp or a bundle of 3 spell scrolls (dm choice). If the players get at least two successes in the skill encounter, Ciaran’s former resistance fighters join the player’s resistance moment instead.
Revolutionis in the air, generated using Google Imagen3

Leave a comment